Wednesday, November 20, 2024

How to Craft Functional Wooden Shoe Racks with Minimal Tools

How to Craft Functional Wooden Shoe Racks with Minimal Tools

Building a Functional Wooden Shoe Rack with Minimal Tools: A Beginner's Guide

Hey there, fellow DIY enthusiasts! Let's face it, shoe chaos is a real thing. That overflowing pile by the door? Yeah, we've all been there. But what if I told you that you could banish that chaotic mess and build a stylish, functional shoe rack using only a handful of tools? It's totally doable, even if you're a complete beginner. This guide will walk you through creating a simple, yet effective shoe rack, perfect for entryways, closets, or even bedrooms. Let's get started!

Choosing Your Materials: Keep it Simple

The beauty of this project is its simplicity. You don't need exotic hardwoods or fancy joinery techniques. We're going for functional and easy. Here's what you'll need:

  • Wood: Pine is a great option because it's readily available, relatively inexpensive, and easy to work with. Consider using 1x4 inch lumber for the sides and shelves. You can adjust the length based on how many shoes you want to store and the available space. For a typical rack, two 3-foot lengths for the sides and three 2-foot lengths for the shelves should suffice.
  • Wood Glue: A good quality wood glue is essential for strong joints.
  • Wood Screws: 1 1/4 inch wood screws are perfect for securing the shelves to the sides. Get a box of at least 24, just to be safe.
  • Sandpaper: You'll need sandpaper in a few grits (80, 120, and 220) to smooth out the wood and get a nice finish.
  • Optional: Wood stain or paint to customize your shoe rack. A sealant is also a good idea if you’re staining to protect it.

Tools You'll Need: The Minimalist Approach

I'm emphasizing the "minimal tools" aspect here, so let’s keep it simple. You'll only need a few basic tools, most of which you probably already have around the house:

  • Measuring Tape: Accurate measurements are crucial for a well-built rack.
  • Pencil: For marking your cuts and screw locations.
  • Saw: A hand saw will work just fine. A circular saw would make it quicker but isn't strictly necessary.
  • Drill with Drill Bits: You’ll need a drill bit slightly smaller than the diameter of your wood screws to create pilot holes. This prevents the wood from splitting.
  • Screwdriver (or drill with screwdriver bit): To drive in the screws.

Building Your Shoe Rack: Step-by-Step Instructions

Cutting the Wood

First, measure and cut your lumber according to your chosen dimensions. Remember to account for the thickness of your wood when calculating the spacing between shelves. For example, if you want 12-inch spacing between shelves and your wood is 1 inch thick, you'll cut your shelf supports to be 11 inches apart.

Assembling the Sides and Shelves

Apply wood glue to the ends of the shelf supports. Then, position the shelves between the two side pieces, making sure they are evenly spaced. Pre-drill pilot holes before screwing the shelves to the side pieces. This is a crucial step to prevent the wood from splitting, especially with hardwoods. Use your drill to carefully drive in your screws, ensuring they’re snug but not overtightened.

Sanding and Finishing

Once the glue is dry and everything is securely fastened, take your sandpaper and smooth out any rough edges or splinters. Start with the coarser grit (80) and gradually move to finer grits (120 and then 220) for a really smooth finish. If you're using stain or paint, apply it according to the manufacturer's instructions. Let it dry completely before applying a sealant (if using). This will protect your shoe rack from spills and wear.

Tips for Success

  • Measure twice, cut once: This is the golden rule of woodworking. Accurate measurements are key to avoiding mistakes.
  • Use clamps: Clamps will help hold the pieces together while the glue dries, resulting in a much stronger joint.
  • Don't overtighten screws: Overtightening can strip the wood or break the screws.
  • Take your time: Rushing the process can lead to mistakes. Relax, take your time, and enjoy the process.
  • Personalize it!: This is your chance to get creative. Paint it a bright color, stain it a rich dark brown, or even add some decorative elements.

Variations and Upgrades

This basic design is a great starting point. You can easily customize it to fit your needs and style. Consider these options:

  • Add more shelves: Need more storage? Simply add more shelves to accommodate more shoes.
  • Make it taller/wider: Adjust the dimensions to fit the space you have available.
  • Add dividers: For better organization, you could add small dividers to separate different types of shoes.
  • Use different types of wood: Experiment with different wood types to achieve different looks and levels of durability.
  • Incorporate wheels: Add caster wheels to the bottom for easy mobility.

Frequently Asked Questions (FAQs)

Q: Can I use other types of wood besides pine?

A: Absolutely! Hardwoods like oak or maple will result in a more durable and aesthetically pleasing rack, but they'll be more challenging to work with for beginners.

Q: How much does this project cost?

A: The cost will vary depending on the price of lumber and other materials in your area, but you should be able to build a basic rack for under $20-$30.

Q: What if my screws are too long and go through the wood?

A: Use shorter screws, or if you have already driven the screws in, use wood filler to fill the holes on the other side.

Q: How do I prevent the wood from warping?

A: Acclimate your wood to the environment for a few days before you begin working on your project. Also, ensure your wood is properly dried before use.

Q: Can I build this without a drill?

A: While a drill makes the process much easier, you can technically use a screwdriver, but it will take significantly longer.

There you have it! With a little time and effort, you can build a functional and stylish shoe rack that will transform your entryway or closet. Happy building!

Tuesday, November 19, 2024

Jewelry Box Designs with Mirror Features for Added Appeal

Jewelry Box Designs with Mirror Features for Added Appeal

Jewelry Box Designs with Mirror Features for Added Appeal

Hey there, jewelry lovers! Are you looking for a jewelry box that's as stunning as your collection? Then you've come to the right place! Jewelry boxes are more than just storage; they're a reflection of your style and a way to showcase your precious pieces. And what elevates a jewelry box from ordinary to extraordinary? You guessed it â€" mirrors!

Mirrors add a touch of glamour and functionality to any jewelry box. They allow you to see your jewelry from all angles, making it easier to choose the perfect pieces for your outfit. Plus, they create the illusion of more space and can make your jewelry box look even more luxurious.

So, let's dive into the world of jewelry boxes with mirror features and explore some amazing designs that will make your heart (and your jewelry) sing!

Mirror Magic: Designs You'll Love

From classic to contemporary, there's a mirrored jewelry box design out there for every taste and budget. Here are a few ideas to spark your imagination:

1. The Classic Mirrored Jewelry Box

Think vintage Hollywood glamour! These boxes are often made with wood, have a hinged lid, and feature a large, mirrored interior. Inside, you'll often find velvet-lined compartments and drawers to keep your jewelry organized and protected. Some classic boxes may also have a small mirror on the lid, perfect for quick touch-ups.

2. The Modern Mirrored Jewelry Box

For a sleek, minimalist look, a modern mirrored jewelry box is the way to go. Think clean lines, geometric shapes, and maybe even some acrylic accents. Many modern designs feature multiple compartments and drawers, making it easy to organize necklaces, earrings, bracelets, and rings. The mirrored surfaces create a sense of spaciousness, and the clean lines make it easy to see your jewelry.

3. The Traveling Jewelry Box

Always on the go? A travel jewelry box is a must-have! These compact boxes are perfect for taking your essentials with you when you travel. Look for designs with a built-in mirror, or even a small LED light. You'll be ready for any event, no matter where your adventures take you.

4. The Unique Mirrored Jewelry Box

Don't be afraid to get creative! There are many unique mirrored jewelry box designs out there. Think about a box shaped like a heart, a flower, or even your favorite animal! You could also get a box with a mirrored exterior, creating a striking focal point in your bedroom or dressing room.

Beyond Mirrors: Added Features to Enhance Your Jewelry Box

Mirrors are amazing, but let's not forget about other features that can elevate your jewelry box to a whole new level:

  • Velvet Lining: A luxurious touch that protects your delicate jewelry from scratches and tarnishing.
  • Compartments and Drawers: Keep your jewelry organized and easy to find. Some boxes even have special compartments for necklaces, rings, and earrings.
  • LED Lighting: Perfect for illuminating your jewelry and making it easier to see everything clearly.
  • Lock and Key: Ensure your precious pieces are safe and secure.
  • Customizable Options: Some manufacturers offer personalization options, like engraving your initials or adding a special message.

Choosing the Perfect Mirrored Jewelry Box

Now that you've seen some amazing designs, it's time to choose the perfect mirrored jewelry box for you. Here are a few factors to consider:

  • Size and Shape: Choose a box that's large enough to hold all your jewelry comfortably, but not so large that it takes up too much space. Consider the shape of your jewelry and the types of pieces you own.
  • Material: Wood, metal, acrylic, and even leather are all popular materials for jewelry boxes. Choose a material that complements your style and decor.
  • Mirror placement and size: Consider how you'll use the mirrors. Do you need a large mirror for dressing, or will a small one on the lid suffice?
  • Features: Think about what features are most important to you. Do you need a lock and key, compartments for specific jewelry types, or LED lighting?
  • Budget: Mirrored jewelry boxes are available in a wide range of prices. Set a budget before you start shopping to avoid overspending.

Tips for Maintaining Your Mirrored Jewelry Box

Once you've found your perfect mirrored jewelry box, you'll want to take good care of it to keep it looking its best. Here are a few tips:

  • Dust regularly: Dust can build up on the mirrors and make them look cloudy. Use a soft cloth or microfiber duster to gently clean the surfaces.
  • Avoid harsh chemicals: Cleaning products with harsh chemicals can damage the finish of your jewelry box. Stick to mild soap and water, or use a specialized jewelry box cleaner.
  • Keep it dry: Moisture can damage the mirrors and other materials in your jewelry box. If it gets wet, dry it thoroughly with a soft cloth.
  • Store it in a cool, dry place: Avoid storing your jewelry box in direct sunlight or in areas with high humidity. These conditions can cause the materials to warp or crack.

Commonly Asked Questions

1. Why are mirrored jewelry boxes so popular?

Mirrored jewelry boxes are popular because they're both functional and stylish. They allow you to easily see and organize your jewelry, and the reflective surfaces create a luxurious and glamorous look.

2. Are mirrored jewelry boxes expensive?

Mirrored jewelry boxes come in a wide range of prices, depending on the size, material, and features. You can find affordable options, as well as more luxurious and high-end designs.

3. How do I clean a mirrored jewelry box?

Use a soft cloth or microfiber duster to gently clean the mirrors. Avoid using harsh chemicals or abrasive cleaners. You can also use a specialized jewelry box cleaner.

So, there you have it! Now that you're equipped with all this information, get ready to find the perfect mirrored jewelry box to showcase your stunning collection and add a touch of sparkle to your life. Happy shopping!

Monday, November 18, 2024

Profitable Key Holder Ideas for Beginners to Build and Sell

Profitable Key Holder Ideas for Beginners to Build and Sell

Profitable Key Holder Ideas for Beginners to Build and Sell

Key holders are essential items in everyday life, offering a practical and stylish solution for organizing keys. As a beginner craftsperson, building and selling key holders can be a lucrative and enjoyable venture. This article explores various profitable key holder ideas, providing step-by-step instructions and valuable tips to help you embark on your crafting journey.

1. Wooden Key Holders

Wooden key holders offer a natural and timeless appeal, adding a touch of warmth and rustic charm to any space. Here's how you can craft them:

Materials:

  • Wood board (pine, oak, or maple)
  • Wood glue
  • Screws or nails
  • Sandpaper (various grits)
  • Wood stain or paint (optional)
  • Key hooks (metal or wooden)
  • Finishing oil or wax (optional)

Instructions:

  1. Cut the wood board to your desired size and shape. For a traditional look, consider a rectangular or square shape.
  2. Sand the wood board thoroughly using sandpaper, starting with a coarser grit and gradually moving to a finer grit for a smooth finish.
  3. If desired, stain or paint the wood board to enhance its appearance or create a specific color scheme.
  4. Attach the key hooks to the wood board using screws or nails. Ensure the hooks are spaced evenly and securely fastened.
  5. Once the hooks are attached, apply a finishing oil or wax to protect the wood and enhance its natural beauty.

2. Upcycled Key Holders

Embrace sustainability and creativity by repurposing old items into unique key holders. Explore these ideas:

A. Repurposed Wine Bottle Key Holders:

  • Clean and dry a glass wine bottle thoroughly.
  • Cut the bottle in half using a glass cutter or a diamond blade.
  • Sand the cut edges of the bottle for a smooth finish.
  • Attach key hooks to the bottom half of the bottle using strong adhesive or epoxy.
  • Decorate the bottle using paint, decoupage, or other embellishments.

B. Upcycled Tin Can Key Holders:

  • Clean and dry a tin can (soup cans or coffee cans work well).
  • Decorate the can using paint, fabric, or other materials.
  • Attach key hooks to the can using strong adhesive or by drilling holes and attaching them with screws.
  • Alternatively, create a key holder from the can's lid. Punch holes around the rim and thread a piece of rope or chain through them for hanging. Attach key hooks to the underside of the lid.

3. Macrame Key Holders

Macrame offers a bohemian and artistic touch to key holders. This technique involves knotting cords together to create intricate designs.

Materials:

  • Macrame cord (natural or synthetic)
  • Wooden dowel or ring (for the base)
  • Scissors
  • Key hooks (optional)

Instructions:

  1. Securely attach the macrame cord to the wooden dowel or ring.
  2. Following macrame knotting techniques, create a series of knots around the dowel or ring, forming a decorative pattern.
  3. Leave sufficient space for attaching key hooks.
  4. If desired, attach key hooks to the macrame design using strong adhesive or by weaving them into the knots.
  5. Trim the cords to create a neat and finished appearance.

4. Resin Key Holders

Resin key holders offer a modern and versatile option, allowing you to incorporate various colors, textures, and embellishments.

Materials:

  • Epoxy resin and hardener
  • Silicone mold (key holder shape)
  • Measuring cups and stirring sticks
  • Gloves and a respirator mask
  • Pigment or mica powder (optional)
  • Embellishments (dried flowers, glitter, shells)
  • Key hooks (optional)

Instructions:

  1. Mix the resin and hardener according to the manufacturer's instructions, ensuring they are thoroughly combined.
  2. If desired, add pigment or mica powder to create the desired color.
  3. Pour the resin mixture into the silicone mold, ensuring it fills the entire mold.
  4. Incorporate embellishments into the resin, gently pressing them into the mixture.
  5. Allow the resin to cure completely according to the manufacturer's instructions.
  6. Once cured, remove the resin key holder from the mold.
  7. If desired, attach key hooks to the back of the resin key holder using strong adhesive or by drilling holes and attaching them with screws.

5. Ceramic Key Holders

Ceramic key holders offer a timeless and elegant aesthetic. You can craft them using clay and a kiln.

Materials:

  • Ceramic clay
  • Rolling pin
  • Clay sculpting tools
  • Kiln
  • Glaze (optional)
  • Key hooks (optional)

Instructions:

  1. Roll out the ceramic clay to a desired thickness.
  2. Cut out the desired shape for your key holder using a cookie cutter or a knife.
  3. Add decorative elements, such as patterns, textures, or embellishments, using clay sculpting tools.
  4. If desired, attach key hooks to the back of the key holder using clay or by drilling holes and attaching them with screws.
  5. Place the key holder in a kiln and fire it according to the clay manufacturer's instructions.
  6. Once fired, apply glaze (optional) and refire the key holder in the kiln to set the glaze.

Tips for Selling Key Holders

Here are some tips for selling your handmade key holders:

  • Target your audience: Determine your ideal customer base and design key holders that appeal to their tastes and needs.
  • Showcase your work: Create high-quality photographs of your key holders and present them professionally on your website or social media platforms.
  • Price your products fairly: Consider your materials, time, and effort invested in crafting the key holders when setting your prices.
  • Offer excellent customer service: Respond promptly to inquiries and provide a positive and personalized experience for buyers.
  • Promote your business: Participate in craft fairs, markets, or online marketplaces to reach potential customers.
  • Seek feedback: Encourage customers to leave reviews or feedback to improve your products and services.

Building and selling key holders can be a rewarding endeavor, allowing you to express your creativity and earn a living doing something you love. By following these ideas and tips, you can establish a successful and profitable crafting business.

How to Make Wooden Candle Holders as Beautiful Gift Ideas

How to Make Wooden Candle Holders as Beautiful Gift Ideas

Crafting Captivating Wooden Candle Holders: The Perfect Gift

Looking for a unique and heartfelt gift that showcases your creativity and thoughtfulness? Look no further than handcrafted wooden candle holders! These charming pieces, imbued with warmth and natural beauty, are sure to delight any recipient. Whether you're a seasoned woodworker or a novice crafter, this guide will equip you with the knowledge and inspiration to create stunning candle holders that will illuminate the lives of your loved ones.

Selecting the Perfect Wood and Design

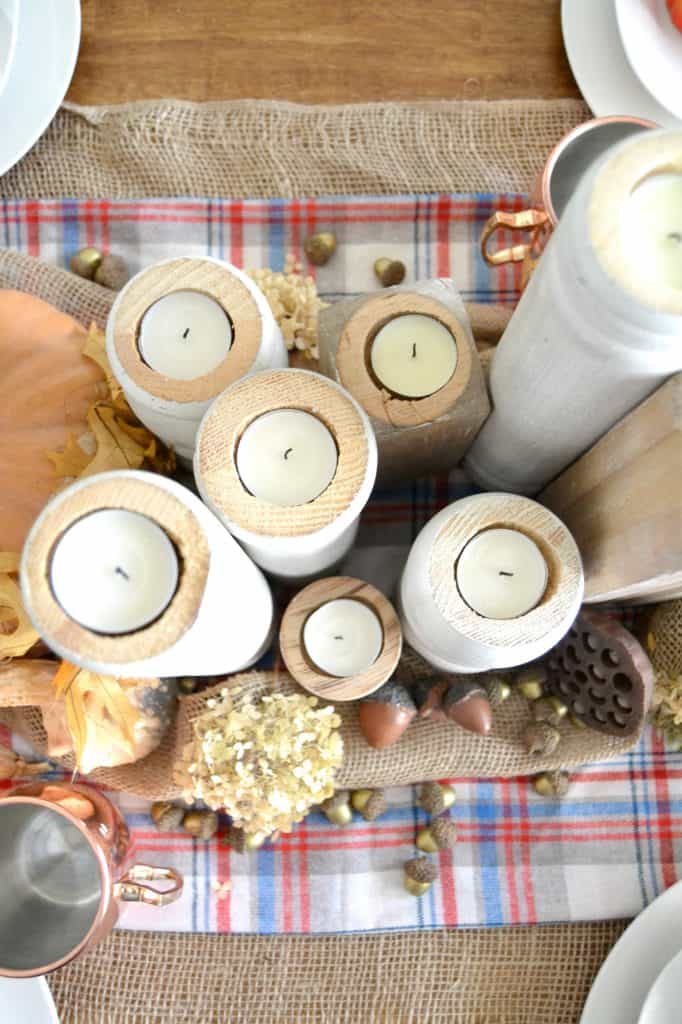
The journey of crafting a beautiful wooden candle holder begins with the selection of your wood. Consider the character and ambiance you want to convey. For a rustic feel, embrace reclaimed wood with its intriguing knots and grain patterns. If you prefer a more polished aesthetic, opt for hardwoods like walnut or cherry, known for their rich colors and smooth textures.

Let Your Creativity Flow:

There are endless design possibilities when it comes to wooden candle holders. Here are a few ideas to ignite your imagination:

  • Simple and Elegant: Create a minimalist design with a circular or square base and a slender pillar to support a single candle.
  • Rustic Charm: Embrace the beauty of natural wood by incorporating branches, twigs, or driftwood into your design. These elements add a touch of organic whimsy.
  • Geometric Wonders: Explore geometric shapes like triangles, hexagons, or pyramids to create a modern and visually striking candle holder.
  • Tiered Delight: Design a candle holder with multiple tiers to accommodate various sizes of candles and create a cascading effect.

Gathering Your Tools and Materials

Before you dive into the crafting process, gather the necessary tools and materials. This will ensure a smooth and enjoyable experience. Here's a list of essential items:

  • Wood: Choose your preferred wood type, ensuring it's properly dried and free of defects.
  • Saw: A handsaw or jigsaw is ideal for cutting your wood to the desired size and shape.
  • Sandpaper: Use various grits of sandpaper to smooth out the wood surface and remove any imperfections.
  • Drill: Use a drill with appropriate drill bits to create holes for candles and for any additional decorative elements.
  • Screwdriver or Hammer: You'll need these tools for assembling the candle holder if you opt for a multi-piece design.
  • Wood Glue: Use wood glue to securely join the different pieces of your candle holder.
  • Finish: Apply a finish like varnish, oil, or wax to protect your wood and enhance its natural beauty.
  • Candles: Choose candles that complement the style and size of your candle holder.

Building Your Masterpiece: Step-by-Step Instructions

Now it's time to bring your design to life! Here's a general guide you can adapt to your chosen design:

  1. Sketch your design: Draw a detailed sketch of your candle holder on paper. This will help you visualize the final product and ensure all your measurements are accurate.
  2. Cut your wood: Using your saw, carefully cut the wood pieces according to your sketch. Remember to account for any joints or overlaps in your design.
  3. Sand the wood: Sand the wood pieces using progressively finer grit sandpaper to achieve a smooth finish. Be sure to sand all surfaces, including edges, for a professional look.
  4. Drill holes: Use a drill to create holes for your candles. Ensure the holes are large enough to accommodate the candle diameter and deep enough to prevent the candle from tipping. If you're adding any decorative elements, drill holes to accommodate them.
  5. Assemble the pieces: If your design involves multiple pieces, use wood glue to join them together. Secure them with clamps and allow the glue to dry thoroughly.
  6. Apply the finish: Choose a finish that aligns with your desired look. Varnish offers a glossy protective layer, while oil and wax create a more natural finish. Apply the finish according to the manufacturer's instructions.
  7. Let it dry: Allow the finish to dry completely before placing candles in the holder.

Enhance Your Candle Holder with Personalization

To truly make your candle holder a treasured gift, consider adding a personal touch. Here are a few ideas:

  • Engraving: Use a wood-burning tool or laser engraver to create a unique design or personalize the holder with a name or special message.
  • Inlay: Add a touch of elegance by incorporating a small piece of contrasting wood or metal into the design. This creates a unique and visually appealing feature.
  • Painting: Paint the candle holder with a coat of stain or use a decorative paint technique for a personalized touch.

Presentation Makes the Gift

Once your candle holder is complete, present it beautifully to make it an unforgettable gift. Consider these ideas:

  • Gift Box: Place the candle holder in a decorative box, adorned with ribbon or tissue paper, for an elegant presentation.
  • Personalized Tag: Add a handwritten tag with a heartfelt message or a special quote to add a touch of sentimentality.
  • Scented Candle: Include a scented candle that complements the candle holder's design or the recipient's preferences.

Illuminating Lives with Thoughtful Craftsmanship

Crafting a wooden candle holder is a labor of love that allows you to express your creativity and share a piece of your heart with a loved one. From the selection of wood to the final touches of personalization, every step of the process allows you to create a unique and cherished gift that will illuminate their lives with warmth and beauty. So, gather your tools, embrace your creativity, and embark on this fulfilling journey of crafting a truly memorable wooden candle holder.

How to Craft Stylish Wooden Coffee Tables for Every Living Room

How to Craft Stylish Wooden Coffee Tables for Every Living Room

Crafting Stylish Wooden Coffee Tables for Every Living Room

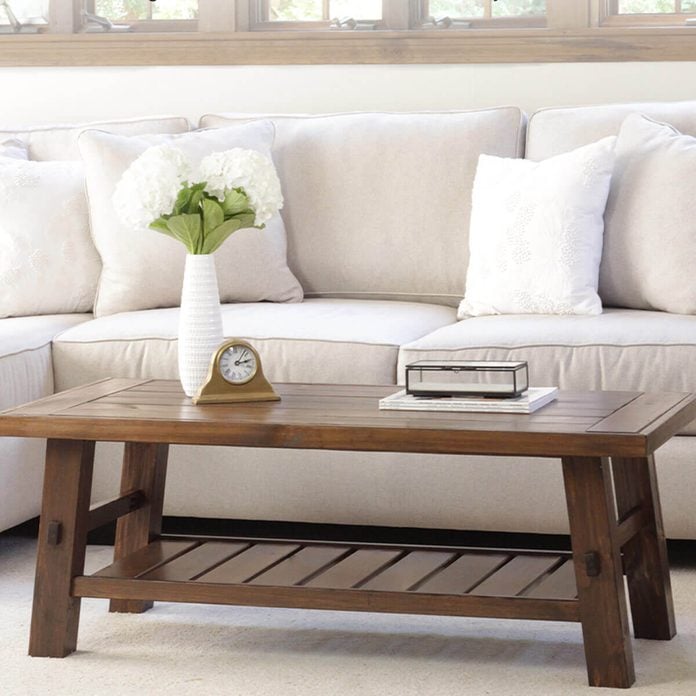
Hey there, design enthusiasts! Let's talk about the heart of your living room - the coffee table. It's not just a place for your coffee cup and snacks; it's a statement piece, a gathering point, and a reflection of your personal style. And what better way to elevate your living room than with a stunning wooden coffee table?

Wooden coffee tables are a timeless classic. They add warmth, character, and a touch of sophistication to any space. But with so many options available, choosing the perfect one can be overwhelming. Fear not, because we're diving deep into the world of wooden coffee tables, exploring different styles, materials, and design ideas to help you find the perfect fit for your living room.

Choosing the Right Wood for Your Coffee Table

The wood you choose for your coffee table will significantly impact its overall look and feel. Think about the kind of vibe you want to create - rustic, modern, or traditional. Each wood species has its own unique characteristics:

  • Oak: A classic choice, known for its durability, beautiful grain patterns, and rich color. It's great for traditional, farmhouse, or contemporary styles.
  • Walnut: A sophisticated option, boasting a deep, dark brown hue and striking grain patterns. It creates a rich, elegant atmosphere, making it ideal for modern or minimalist spaces.
  • Cherry: Known for its warm, reddish-brown tones and smooth finish. It's versatile, working well with traditional, farmhouse, or contemporary designs.
  • Maple: This lightweight wood is known for its pale, creamy color and fine grain. It adds a touch of lightness and brightness, making it a perfect choice for Scandinavian or minimalist styles.
  • Pine: A budget-friendly option with a soft, knotty grain. It's popular for rustic and farmhouse designs.

The wood's finish is equally important. A natural finish highlights the wood's grain and character, while a stained finish adds a touch of color and depth. Consider your personal style and the existing furniture in your living room when deciding on the finish.

Exploring Different Coffee Table Styles

Once you've chosen your wood, it's time to think about the style that best complements your living room. Here are some popular styles to inspire you:

1. Rustic Coffee Tables

Embrace the charm of nature with a rustic coffee table. Think reclaimed wood, distressed finishes, and chunky, natural-looking legs. Rustic coffee tables add a touch of warmth and character to any space, making them perfect for farmhouse, cottage, or industrial-style homes.

2. Modern Coffee Tables

For a sleek and minimalist look, opt for a modern coffee table. These tables often feature clean lines, geometric shapes, and a streamlined design. They are typically made from high-quality wood with a polished finish. Modern coffee tables work well in contemporary, minimalist, or Scandinavian-inspired living rooms.

3. Traditional Coffee Tables

If you love classic elegance, a traditional coffee table is your perfect match. Think intricate carvings, ornate details, and a timeless design. Traditional coffee tables are often made from solid wood with a rich, dark finish. They add a touch of sophistication and grandeur to formal living rooms.

4. Industrial Coffee Tables

Industrial coffee tables boast a rugged and edgy appeal. They often feature metal accents, exposed wood, and a distressed or unfinished look. Industrial coffee tables work well in modern, urban, or loft-style spaces. They add a touch of masculinity and boldness to the room.

5. Farmhouse Coffee Tables

Farmhouse coffee tables combine rustic charm with modern practicality. They feature a simple, functional design, often incorporating reclaimed wood, painted surfaces, and distressed details. Farmhouse coffee tables bring warmth and comfort to living rooms, creating a cozy and inviting atmosphere.

Adding Unique Touches to Your Coffee Table

Now that you've got a good grasp on the different styles, let's spice things up with some unique design ideas! Here are some creative ways to add personality to your wooden coffee table:

  • Sculptural Legs: Transform a basic tabletop into a statement piece with unique, sculpted legs. Think tapered legs, curved legs, or legs with geometric designs.
  • Floating Shelves: Add storage and visual interest with floating shelves beneath the tabletop. You can display books, plants, or decorative items on these shelves.
  • Inlay Designs: Inlay different woods or materials into the tabletop for a visually stunning effect. You could use contrasting wood species, metallic accents, or even natural stones.
  • Etched Designs: Add a personal touch with an etched design on the tabletop. You could etch your initials, a family crest, or even a favorite quote.
  • Custom Hardware: Upgrade your coffee table with unique drawer pulls or handles. Choose hardware in a style that complements your chosen wood and finish.

DIY Wooden Coffee Table Projects

Feeling crafty? Why not DIY your own wooden coffee table? It's a fun and rewarding project that lets you personalize your piece to your exact specifications. Here are a few DIY project ideas to get you started:

  • Pallet Coffee Table: Transform a stack of old pallets into a charming rustic coffee table. Sand, stain, and add legs for a unique and budget-friendly project.
  • Repurposed Wooden Crate Coffee Table: Give old wooden crates a new life as a coffee table. Stack a few crates, secure them together, and add a tabletop for a rustic and functional piece.
  • Simple, Minimalist Design: Challenge yourself with a simple yet elegant design. Choose a single piece of wood for the tabletop, and use basic legs or a simple base.

Caring for Your Wooden Coffee Table

Once you've got your dream wooden coffee table, it's important to give it the care it deserves. Here are a few tips for keeping your table looking its best:

  • Dust Regularly: Wipe your coffee table with a soft, dry cloth to remove dust and debris.
  • Avoid Harsh Cleaners: Never use abrasive cleaners or harsh chemicals on your wooden table. These can damage the finish and dull the wood's natural beauty.
  • Use Coasters: Always use coasters to protect your coffee table from spills and heat damage.
  • Protect from Sunlight: Prolonged exposure to sunlight can fade the wood's color. Try to keep your coffee table out of direct sunlight.
  • Refinish As Needed: Over time, your coffee table may need a touch-up or refinishing. Use a wood polish or a furniture wax to restore its shine and protect the finish.

Commonly Asked Questions

Here are answers to some common questions about wooden coffee tables:

1. How much does a wooden coffee table cost?

The price of a wooden coffee table varies widely, depending on the wood species, style, size, and quality of craftsmanship. You can find affordable options starting at around $100, while high-end custom-made tables can cost several thousand dollars.

2. Are wooden coffee tables durable?

Yes, wooden coffee tables are generally very durable, especially if they are made from solid wood. However, the durability also depends on the wood species and the finish used.

3. What are some alternative materials for coffee tables?

Besides wood, you can find coffee tables made from a variety of other materials, such as metal, glass, concrete, or even stone. These materials offer different aesthetics and durability characteristics.

4. What are some trendy coffee table ideas?

Some current coffee table trends include using mixed materials, incorporating natural elements, and embracing minimalist designs.

There you have it! We hope this guide has inspired you to craft a stunning wooden coffee table that adds warmth, character, and style to your living room. Remember, the possibilities are endless when it comes to choosing the perfect wood, exploring different styles, and adding your own personal touch. Happy designing!

How to Build Jewelry Boxes with a Sleek, Contemporary Look

How to Build Jewelry Boxes with a Sleek, Contemporary Look

Building Sleek, Contemporary Jewelry Boxes

Transform your precious jewelry collection into a stunning display with a custom-built jewelry box that embodies modern aesthetics. Whether you're a seasoned woodworker or a DIY enthusiast, this guide will equip you with the knowledge and steps to create a sleek, contemporary jewelry box that reflects your personal style.

Choosing the Right Materials

The materials you choose will significantly impact the final look and feel of your jewelry box. For a contemporary vibe, opt for sleek, minimalist materials with clean lines.

Wood Options

  • Walnut: Rich, dark tones and natural grain patterns lend a sophisticated touch.
  • Cherry: Warm, reddish-brown hues add a touch of elegance.
  • Maple: Light, clean, and versatile, maple provides a contemporary aesthetic.
  • Bamboo: A sustainable option that offers a distinctive, natural pattern.
  • Other Materials

  • Acrylic: Transparent acrylic panels add a modern edge and allow for showcasing jewelry within.
  • Metal: Aluminum or steel accents can elevate the design with industrial chic.
  • Designing Your Jewelry Box

    Plan the layout and features of your jewelry box to maximize functionality and style. Consider the following:

    Size and Shape

    Determine the optimal size to accommodate your jewelry collection. Rectangular boxes with clean lines exude contemporary elegance.

    Compartments and Drawers

    Design internal compartments or drawers to keep your jewelry organized and secure. Consider using felt lining for added protection.

    Mirror and Lighting

    Integrate a small mirror and LED lighting for a touch of luxury and to enhance the display of your jewelry.

    Construction Techniques

  • Precise Cutting: Use a table saw or jigsaw to ensure accurate cuts for a professional finish.
  • Joining Techniques: Choose robust joining methods like dovetail joints, dado joints, or pocket holes for added strength and durability.
  • Finishing Touches: Sand the wood smoothly and apply a clear coat or stain to enhance the natural beauty of the material and protect it from wear.
  • Adding Modern Details

    Embrace these modern accents to elevate the design of your jewelry box:

    Minimal Hardware

    Opt for sleek, minimalist hinges and handles that blend seamlessly with the design.

    Hidden Compartments

    Create hidden compartments or secret drawers for valuable pieces, adding a touch of intrigue.

    Geometric Patterns

    Incorporate geometric patterns in the wood itself or through inlay techniques to add visual interest.

    Beyond the Basic Box

    Explore these creative ideas for a unique and personalized jewelry box:

    Stackable Boxes

    Design a set of interlocking boxes that can be stacked or arranged in different configurations.

    Wall-Mounted Design

    Create a jewelry box that mounts to the wall, offering a space-saving and stylish solution.

    Personalized Touches

    Add a personal touch with engravings, laser etching, or custom-painted details.

    By following these steps and incorporating your personal style, you can build a sleek, contemporary jewelry box that will enhance your treasured collection and become a stylish centerpiece in your home.

    Tuesday, November 12, 2024

    Diy grill gazebo plans for an easy outdoor setup

    Diy grill gazebo plans for an easy outdoor setup

    DIY Grill Gazebo: Your Easy Outdoor Oasis

    Imagine this: you're grilling up a storm, but instead of battling the elements, you're comfortably nestled under a stylish, DIY gazebo. Sounds like a dream, right? Well, it doesn't have to be. With a little bit of effort and a few basic tools, you can build your own grill gazebo, transforming your backyard into an outdoor haven.

    Don't let the thought of construction intimidate you. This project is surprisingly manageable, even if you're a DIY novice. We'll walk you through every step, from choosing the right materials to assembling your very own personal grill paradise.

    Choosing the Perfect Gazebo Style

    The first step is to decide on the style of gazebo that fits your needs and aesthetic. Do you want a classic, traditional gazebo with a peaked roof, or something more modern and minimalist? There are a few main styles to consider:

    The Classic Gazebo

    Think of the classic gazebo as the grand dame of outdoor structures. It's usually octagonal or square with a distinctive peaked roof, often adorned with elegant details like decorative latticework. It provides ample shade and a sense of grandeur to your backyard.

    The Modern Gazebo

    Modern gazebos embrace clean lines and simplicity. They might feature a flat or slightly angled roof, often with a minimalist frame and sleek fabric coverings. They're perfect for a contemporary backyard aesthetic.

    The Pop-Up Gazebo

    If you're looking for a quick and easy solution, a pop-up gazebo is your best bet. These portable structures are lightweight, easy to assemble, and often come with a variety of size options. While not as sturdy as a traditional gazebo, they're a great option for temporary shade or casual gatherings.

    Essential Materials for Your DIY Grill Gazebo

    Now let's talk materials. This is where you can truly personalize your project. There are plenty of options, from traditional wood to more modern materials like metal and composite.

    Frame

    • Wood: Classic, versatile, and relatively affordable. Pine or cedar are popular choices for their durability and weather resistance. Consider pressure-treated lumber for extra longevity.
    • Metal: Strong, durable, and low-maintenance. Aluminum or steel are good options for a modern look.
    • PVC: Lightweight, moisture-resistant, and affordable. Perfect for a more temporary or portable gazebo.

    Roof

    • Fabric: Easy to work with and available in a variety of colors and patterns. Consider canvas, polyester, or vinyl for durability and weather resistance.
    • Metal roofing: Durable and low-maintenance, but can be heavier and more expensive.
    • Polycarbonate panels: Lightweight, translucent, and weather-resistant. Offers a modern aesthetic and allows for some natural light.

    Planning Your DIY Grill Gazebo: The Design Process

    Before you head to the lumberyard, it's important to have a solid plan in place. You'll want to consider the following:

    • Size: How much space do you need to comfortably accommodate your grill and seating? Allow for adequate clearance around the grill for safe use.
    • Location: Where in your backyard will the gazebo be placed? Ensure it's level, with access to electricity if you plan to use outdoor lighting or a fan.
    • Style: We've already covered this, but it's worth revisiting. Choose a style that complements your home and backyard aesthetic.
    • Budget: Set a realistic budget and stick to it. Don't be afraid to get creative and find affordable alternatives for certain materials.

    Construction Time! Building Your DIY Grill Gazebo

    With your materials and plan in hand, it's time to get building! This is where the fun really begins. Follow these steps:

    1. Laying the Foundation

    Start by laying out the foundation for your gazebo. This could involve concrete footings, pavers, or even just a sturdy platform built of wood. Ensure the foundation is level and secure to prevent any future issues.

    2. Building the Frame

    Cut and assemble the frame pieces according to your plans. If you're using wood, use screws and wood glue for a strong and durable connection. Use metal brackets or connectors for metal frames. Ensure all joints are square and secure.

    3. Creating the Roof

    Now it's time to create your roof. If you're using fabric, you'll need to cut and sew the panels, paying close attention to the size and shape of your frame. If using metal or polycarbonate panels, attach them securely to the frame using appropriate fasteners.

    4. Adding the Finishing Touches

    Once the frame and roof are complete, you can add finishing touches like latticework, decorative trim, and outdoor lighting. This is where you can really personalize your gazebo and make it unique.

    Beyond the Basics: Enriching Your Grill Gazebo

    Now that you have your gazebo built, it's time to make it truly your own. Consider these additions:

    • Outdoor Lighting: String lights, lanterns, or even solar-powered lighting can create a warm and inviting atmosphere.
    • Seating: Provide comfortable seating for your guests with chairs, benches, or even a small outdoor sofa.
    • Side Walls: For added privacy or protection from the elements, consider adding side walls using fabric panels or even mosquito netting.
    • A Small Table: A table for serving food and drinks is a must-have for any grill gazebo.
    • Decor: Plants, flowers, or even wind chimes can add a touch of personality and charm to your outdoor space.

    Building your own grill gazebo is a rewarding project that adds immense value to your backyard. It's a place to relax, socialize, and enjoy the outdoors. So gather your tools, unleash your creativity, and get started on building your very own outdoor oasis!

    Essential Tools for Crafting Your Own Bedside Cabinet

    Essential Tools for Crafting Your Own Bedside Cabinet

    Essential Tools for Crafting Your Own Bedside Cabinet

    Embarking on the journey of crafting your own bedside cabinet is an exciting endeavor that allows you to infuse your personal style and creativity into your bedroom sanctuary. Before diving into the woodworking process, it's crucial to arm yourself with the right tools. These essential companions will help you navigate the intricate details and ensure a successful outcome.

    Essential Hand Tools:

    While power tools can expedite certain tasks, hand tools provide precision and versatility. Here are some indispensable hand tools that should be in your arsenal:

    Measuring and Marking

    • Measuring Tape: A trusty measuring tape is essential for accurate measurements and ensuring your cabinet components fit together perfectly.
    • Carpenter's Pencil: A sharp carpenter's pencil allows for clear and precise marking on wood surfaces.
    • Combination Square: This tool, with its adjustable head, helps create accurate 90-degree angles and precise measurements.
    • Speed Square: A speed square aids in marking and cutting precise angles, especially 45-degree miters.

    Cutting and Shaping

    • Hand Saw: A hand saw is crucial for making straight cuts, especially when trimming wood to size.
    • Jigsaw: A jigsaw provides flexibility in cutting curved shapes and intricate designs into your cabinet pieces.
    • Chisel Set: Chisels are indispensable for carving out intricate details and creating clean, precise edges.

    Joining and Securing

    • Clamps: Clamps hold wood pieces firmly in place, ensuring secure joints during gluing or nailing.
    • Screwdriver Set: A comprehensive screwdriver set with various sizes and types is necessary for assembling and securing your cabinet.
    • Wood Glue: Wood glue provides a strong bond between wooden components, creating durable joints.
    • Hammer: A hammer is used to drive nails and secure various components during the assembly process.

    Power Tools:

    While not strictly necessary, power tools can make the crafting process significantly faster and more efficient. Consider adding these power tools to your arsenal:

    Cutting

    • Circular Saw: A circular saw is a powerful tool for making straight and precise cuts through wood, ideal for cutting large panels to size.
    • Table Saw: For intricate cutting tasks and achieving perfectly straight and consistent cuts, a table saw is invaluable.

    Sanding

    • Random Orbit Sander: A random orbit sander ensures a smooth and consistent finish on your cabinet surfaces.

    Finishing Touches:

    After constructing the cabinet, it's time to enhance its beauty and durability with finishing touches:

    Sanding and Finishing

    • Sandpaper: A variety of sandpaper grits is necessary for smoothing wood surfaces and preparing them for finishing.
    • Wood Stain: Stain adds color and depth to your cabinet, enhancing its natural grain patterns.
    • Polyurethane Finish: Polyurethane provides a protective and durable coating, protecting your cabinet from scratches and moisture.

    With this comprehensive toolkit at your disposal, you'll be equipped to tackle the exciting challenge of crafting your own unique bedside cabinet. Remember, patience and attention to detail are key to achieving a beautiful and functional piece of furniture that reflects your personal style.

    Winter Cold Frame Plans for Any Budget

    Winter Cold Frame Plans for Any Budget

    Winter Cold Frame Plans for Any Budget

    Extend your gardening season and enjoy fresh vegetables even during the winter months with a cold frame. These simple structures act as mini-greenhouses, providing a protected environment for plants to thrive in colder temperatures. Building a cold frame is a rewarding DIY project that can be tailored to your needs and budget. Whether you're a seasoned gardener or just starting out, this guide provides comprehensive plans and tips to help you create the perfect cold frame for your garden.

    Understanding Cold Frames

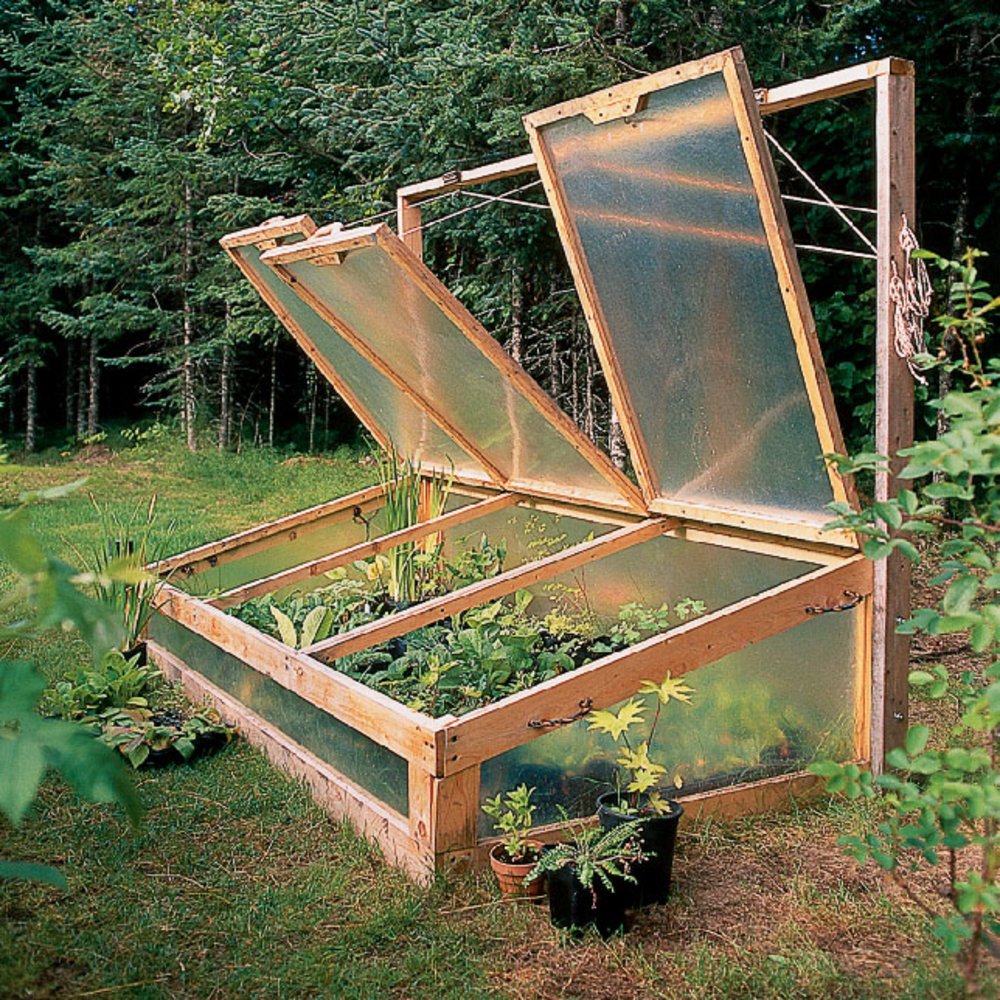
    Cold frames are essentially miniature greenhouses without heating. They harness the sun's energy to create a warmer microclimate inside, protecting plants from frost and harsh weather conditions. The basic structure consists of a frame made of wood, metal, or even recycled materials, topped with a transparent cover, often glass or polycarbonate panels.

    Benefits of Using a Cold Frame

  • Extended Growing Season: Cold frames allow you to start seeds earlier in the spring and continue harvesting fresh produce well into the fall and even winter.
  • Protection from Frost: The transparent cover traps warmth from the sun, preventing frost damage and allowing delicate plants to survive colder temperatures.
  • Improved Seedling Growth: The sheltered environment provides optimal conditions for seedlings to germinate and develop strong roots, leading to healthier plants.
  • Reduced Water Needs: The enclosed space minimizes evaporation, reducing watering frequency and conserving water.
  • Cost-Effective: Building a cold frame is a relatively inexpensive way to extend your gardening season and save money on heating costs.
  • Types of Cold Frames

    Cold frames come in various designs and sizes to suit different needs and preferences. Here are some common types:

    1. Traditional Cold Frame

    The classic cold frame features a rectangular wooden frame with a sloping glass or polycarbonate cover. This design is simple to build and offers excellent insulation. However, it can be heavy and difficult to move.

    2. Gable-Top Cold Frame

    Similar to the traditional design, the gable-top cold frame has a roof shaped like a gable, providing increased headroom and ventilation. This design is ideal for taller plants and can be easily adapted for various sizes.

    3. Lean-To Cold Frame

    A lean-to cold frame is attached to an existing wall or structure, creating a sheltered space that takes advantage of the wall's insulation. This design is compact and requires less materials, but it may have limited sun exposure.

    4. Portable Cold Frame

    Portable cold frames are designed for easy movement, allowing you to relocate them as needed to maximize sun exposure or protect plants from harsh conditions. They are typically made of lightweight materials like PVC pipe or metal frames.

    Cold Frame Construction: A Step-by-Step Guide

    Building a cold frame is a straightforward process that requires basic woodworking skills and a few essential tools. This guide outlines the steps for constructing a traditional cold frame:

    1. Gather Materials

  • Wood: Choose durable, rot-resistant wood like cedar, redwood, or pressure-treated lumber. Consider using 2x4s for the frame and 1x4s for the bracing.
  • Glass or Polycarbonate Panels: Glass offers excellent light transmission but can be heavy and breakable. Polycarbonate is lighter, more durable, and comes in various thicknesses.
  • Hardware: You'll need screws, hinges, brackets, and possibly corner braces to assemble the frame.
  • Optional: For additional insulation, consider using foam board or fiberglass insulation for the frame and a layer of bubble wrap for the cover.
  • 2. Cut the Wood

    Cut the lumber according to your desired dimensions. For a standard cold frame, a 4x4 foot base is recommended. Cut two pieces for the front and back of the frame, two for the sides, and two for the bracing. Cut the top of the frame to fit the size of your glass or polycarbonate panels.

    3. Assemble the Frame

    Using screws and corner braces, assemble the frame, ensuring that the corners are square and the sides are parallel. Attach the bracing to the inside of the frame to reinforce its structure. Leave a small gap between the front and back of the frame for ventilation.

    4. Attach the Cover

    Choose the method for attaching the cover based on the material you used. Glass panels can be secured with glazing strips or a silicone sealant. Polycarbonate panels can be attached with screws, clips, or a combination of both.

    5. Position and Level the Cold Frame

    Choose a sunny location for your cold frame and place it on level ground. You may need to adjust the legs or use leveling blocks to ensure proper drainage. Consider adding a layer of gravel or stones beneath the frame for better drainage.

    6. Ventilate and Shade

    Proper ventilation is crucial for healthy plant growth. Open the lid of the cold frame on warmer days to allow air circulation and prevent overheating. During extremely hot periods, consider shading the cold frame to reduce heat buildup.

    Tips for Success

  • Choose the Right Plants: Select cold-hardy plants like lettuce, spinach, kale, broccoli, and herbs that thrive in cooler temperatures.
  • Prepare the Soil: Ensure the soil is well-drained and amend it with compost or other organic matter to improve fertility and water retention.
  • Water Regularly: The soil in a cold frame can dry out quickly, so monitor moisture levels and water as needed.
  • Monitor Temperatures: Use a thermometer to track the temperature inside the cold frame and adjust ventilation accordingly. Ideal temperatures range from 40-70 degrees Fahrenheit.
  • Protect from Pests and Diseases: Keep a close eye on your plants for signs of pests or diseases and take immediate action to control any problems.
  • Budget-Friendly Options

    Building a cold frame doesn't have to break the bank. Here are some cost-effective options:

    1. Recycled Materials

    Repurpose old windows, doors, or even discarded pallets to create a unique and sustainable cold frame. Get creative and experiment with different materials to find what works best for you.

    2. DIY Frames

    Instead of purchasing pre-cut lumber, consider using scrap wood or inexpensive plywood to construct the frame. You can save money by cutting and assembling the frame yourself.

    3. Simple Designs

    Opt for a simpler cold frame design with fewer materials and fewer steps. A lean-to or a single-pane design can be built quickly and easily.

    Conclusion

    Building a cold frame is an excellent way to extend your gardening season and enjoy fresh, homegrown produce year-round. With a little planning and creativity, you can create a functional and budget-friendly cold frame that suits your specific needs and enhances your gardening experience.

    Crafting a Squirrel Box: Plans for Novices

    Crafting a Squirrel Box: Plans for Novices

    Crafting a Squirrel Box: A Beginner's Guide to Building a Delightful Habitat

    Enriching your backyard with a squirrel box is a rewarding endeavor, inviting these playful creatures to your domain. This guide provides a comprehensive walkthrough for crafting a squirrel box, even for those with limited woodworking experience.

    Choosing the Right Wood

    The foundation of a sturdy and long-lasting squirrel box is the wood you choose. Select a type that is both resistant to rot and weathering and easy to work with.

    Recommended Wood Options

    • Cedar: Known for its natural resistance to decay and insects, cedar is an excellent choice for squirrel boxes.
    • Redwood: Similar to cedar, redwood is highly durable and offers excellent resistance to rot and weathering.
    • Pressure-Treated Pine: While not as aesthetically pleasing as cedar or redwood, pressure-treated pine provides long-lasting protection against moisture and rot.

    Avoid using softwoods like pine or spruce, as they are prone to damage and may not hold up well over time.

    Design Considerations

    Before you begin building, consider the design elements that will make your squirrel box inviting and functional.

    Size and Dimensions

    A standard squirrel box should be roughly 12 inches wide, 12 inches deep, and 18 inches high. These dimensions provide ample space for a squirrel family to nest comfortably.

    Entrance Hole

    The entrance hole should be approximately 3-4 inches in diameter, large enough for a squirrel to easily enter and exit but small enough to deter larger predators.

    Ventilation

    Ensure proper ventilation by incorporating air holes on the sides or back of the box. This allows air circulation and prevents moisture buildup, which can lead to mold and decay.

    Roof overhang

    A roof overhang protects the entrance hole from rain and snow, keeping the interior dry and comfortable for the squirrels.

    Materials and Tools

    Gather the necessary materials and tools before starting construction.

    Materials

    • Wood boards (cedar, redwood, or pressure-treated pine)
    • Wood screws or nails
    • Wood glue (optional)
    • Roofing shingles or metal roofing material
    • Paint or stain (optional)

    Tools

    • Saw (circular saw, jigsaw, or handsaw)
    • Drill with drill bits
    • Measuring tape
    • Level
    • Hammer
    • Screwdriver
    • Safety glasses
    • Work gloves

    Step-by-Step Instructions

    Follow these step-by-step instructions to build your squirrel box:

    Step 1: Cut the Wood

    Using your saw, cut the wood boards to the desired dimensions for the box. These dimensions will include the front, back, sides, and bottom panels, as well as the roof.

    Step 2: Assemble the Box

    Begin by attaching the front and back panels to the bottom panel using screws or nails. Secure the side panels to the front, back, and bottom panels, ensuring that the corners are square and the structure is strong.

    Step 3: Create the Entrance Hole

    Use a drill or saw to create the entrance hole on the front panel, approximately 3-4 inches in diameter. Smooth the edges of the hole to prevent injury to the squirrels.

    Step 4: Install the Roof

    Attach the roof panels to the top edges of the box. You can choose to create a simple flat roof or a more elaborate angled roof. For a more durable roof, use roofing shingles or metal roofing material.

    Step 5: Add Ventilation

    Drill several air holes on the sides or back of the box to ensure proper ventilation. This will help prevent moisture buildup and maintain a healthy environment for the squirrels.

    Step 6: Secure the Roof

    Attach the roof to the box using screws or nails, ensuring that it is securely fastened to withstand wind and weather conditions.

    Step 7: Finish and Decorate

    (Optional) If desired, you can paint or stain the exterior of the squirrel box to enhance its appearance and protect the wood.

    Installation and Placement

    Once your squirrel box is complete, it's time to choose the perfect location in your yard for installation.

    Location

    Locate the box in a shaded area that provides protection from harsh sunlight and rain. Choose a location that is close to trees for easy access, but not directly on the trunk to prevent damage from the squirrels climbing.

    Height

    Mount the box at a height of 6-10 feet above ground level, using sturdy brackets or poles. This height deters potential predators and offers a safe haven for the squirrels.

    Maintenance

    Maintaining your squirrel box will ensure its longevity and create a welcoming habitat for the squirrels.

    Cleaning

    Clean the box annually, especially before nesting season. Remove any debris, old nesting material, or parasites. Avoid using harsh chemicals that may harm the squirrels.

    Repairs

    Inspect the box regularly for any damage or signs of wear and tear. Repair any holes or weak spots promptly to prevent the box from becoming compromised.

    Conclusion

    Building a squirrel box is a simple yet rewarding way to provide shelter and attract these delightful creatures to your backyard. By following these steps, you can create a safe and cozy haven for squirrels, enriching your landscape and fostering a greater appreciation for these fascinating animals.

    Building a Squirrel Box in 5 Easy Steps

    Building a Squirrel Box in 5 Easy Steps

    Building a Squirrel Box in 5 Easy Steps

    Squirrel boxes, also known as squirrel feeders, are a great way to provide a safe and comfortable habitat for squirrels in your backyard. They are relatively easy to build, and with a few simple tools and materials, you can create a welcoming home for these playful creatures. This article will guide you through the process of building a squirrel box in 5 easy steps.

    Materials and Tools

    Before you begin, ensure you have gathered the necessary materials and tools. This will make the construction process smoother and prevent any delays.

    Materials

    • 1x6 inch pine boards (approximately 8 feet long)
    • 1x4 inch pine boards (approximately 8 feet long)
    • 1/2-inch plywood (for the roof)
    • 1-inch diameter dowel rod (for the perch)
    • Exterior wood screws (1 1/2 inches)
    • Wood glue
    • Exterior wood stain or paint (optional)
    • Heavy-duty wire mesh (for ventilation and predator protection)

    Tools

    • Saw (circular saw or hand saw)
    • Drill with various drill bits
    • Measuring tape
    • Level
    • Hammer
    • Screwdriver
    • Clamps
    • Safety glasses

    Step 1: Cut the Wood

    Start by cutting the lumber to size. You can use a circular saw or a hand saw for this step. It is helpful to have a detailed plan or blueprint for your squirrel box to ensure all pieces are accurately cut. The following dimensions are a guideline, but you can adjust them based on your preference and the size of the squirrels in your area.

    • Front and Back Panels: 12 inches wide x 16 inches tall
    • Side Panels: 12 inches wide x 10 inches tall
    • Bottom Panel: 12 inches wide x 12 inches long
    • Roof Panels: 14 inches wide x 18 inches long (cut two)
    • Entrance Hole: 4 inches wide x 6 inches tall
    • Perch: 6 inches long (cut two)

    Step 2: Assemble the Box

    Once the wood pieces are cut, you can begin assembling the box. Use wood glue and exterior wood screws to join the pieces together. Be sure to use screws that are long enough to secure the wood pieces properly.

    1. Attach the Side Panels: Align the side panels with the front and back panels, making sure the top edges are flush. Attach the side panels to the front and back panels using wood glue and screws.
    2. Add the Bottom Panel: Attach the bottom panel to the assembled side panels using wood glue and screws.
    3. Install the Entrance Hole: Using a jigsaw or a drill with a large bit, cut the entrance hole into the front panel. It should be high enough to provide a clear passage for the squirrels.
    4. Attach the Perch: Drill two holes on either side of the entrance hole, about 2 inches from the top. Insert the dowel rod pieces into the holes and secure them with wood glue and screws to create the perch.

    Step 3: Build the Roof

    The roof is designed to keep the squirrels dry and protected from the elements. It's essential to build a sturdy and secure roof.

    1. Cut the Plywood: Cut the plywood into two panels, each measuring 14 inches wide x 18 inches long. These will form the roof panels.
    2. Attach the Panels: Attach the two plywood panels to the top of the box using wood glue and screws, creating an overlapping roof. The overlapping section should be at least 2 inches wide.
    3. Add Ventilation: Use heavy-duty wire mesh to create ventilation holes in the roof. This will allow for proper airflow and prevent moisture buildup inside the box.

    Step 4: Finish the Box

    The final step is to finish the box to protect it from the elements and enhance its appearance.

    1. Sanding: Sand the entire surface of the box to smooth out any rough edges or imperfections. This will also help the stain or paint adhere better.
    2. Staining or Painting: Apply a coat of exterior wood stain or paint to the box. This will provide a protective layer and enhance the durability of the box. It is important to use a stain or paint that is specifically designed for outdoor use.

    Step 5: Placing the Squirrel Box

    Once the box is complete, it's time to find the perfect location to place it. Consider these factors when selecting the spot:

    • Height: The box should be placed at least 10 feet above the ground to deter predators.
    • Shade: It's best to choose a spot that offers some shade during the hottest parts of the day, protecting the squirrels from overheating.
    • Accessibility: Ensure the box is in a location where squirrels can easily access it, with nearby trees or branches for them to climb onto.
    • Protection: The box should be placed away from busy areas or potential hazards, such as busy roads or fences.

    To encourage squirrels to use the box, you can place a small amount of birdseed inside. The scent of food may entice them to investigate the box and make it their new home. Regularly check the box to ensure it remains clean and dry, and replace any damaged or worn parts as needed.

    Building a squirrel box is a rewarding project that can bring joy to your backyard. By providing a safe and comfortable habitat, you'll be able to enjoy the antics of these playful creatures from a safe distance. Remember to use sturdy materials, follow the instructions carefully, and choose a suitable location. With a little effort, you can create a welcoming home for squirrels that will enrich your backyard ecosystem.

    DIY Cold Frame with Free Downloadable Plans

    DIY Cold Frame with Free Downloadable Plans

    Build Your Own Cold Frame: A Step-by-Step Guide with Free Downloadable Plans

    Tired of waiting for the spring thaw to start your garden? A cold frame can extend your growing season and give your plants a head start. It's a simple structure that traps solar heat, protecting your seedlings from frost and harsh weather. And the best part? You can build one yourself!

    In this guide, we'll walk you through constructing your own cold frame using free downloadable plans. No matter your skill level, you can create a sturdy and effective cold frame that will become a valuable addition to your garden.

    Why Build a Cold Frame?

    A cold frame is a gardener's best friend for several reasons:

    • Extend Your Growing Season: Start seeds earlier in the spring and harvest later in the fall, maximizing your gardening time.
    • Protect Plants from Harsh Weather: Shield your seedlings from frost, wind, and heavy rain, giving them a safe environment to thrive.
    • Create a Warm Microclimate: The trapped solar heat creates a warmer environment, ideal for tender plants and seedlings.
    • Save Money: Building a cold frame is a budget-friendly way to extend your gardening season and protect your plants.

    Free Downloadable Plans

    Before you start building, you'll need a plan. We've created a set of free downloadable plans to make the process easy and stress-free. These plans include detailed instructions, diagrams, and materials list, ensuring you have everything you need for a successful build.

    Click here to download your free cold frame plans: [link to downloadable plans]

    Step-by-Step Building Guide

    Once you have your plans, you're ready to start building! Here's a step-by-step guide to help you along the way:

    1. Gather Your Materials

    Review your plans and make sure you have all the necessary materials. This might include wood, screws, hinges, glazing, and more. A trip to your local hardware store is in order!

    2. Prepare the Base

    Start by constructing the base of your cold frame. Follow the plans carefully, ensuring the base is level and sturdy. You can build a rectangular or square base, depending on your preference and available space.

    3. Add the Sides

    Next, add the sides of your cold frame. These will be attached to the base, creating a box-like structure. The sides should be tall enough to provide ample protection for your plants. You can use wood or other materials for the sides, depending on your desired aesthetic.

    4. Install the Lid

    The lid is an essential component of your cold frame. It traps the warmth of the sun while also allowing you to easily access your plants. Attach hinges to the lid and make sure it opens smoothly.

    5. Glazing

    Glazing is the process of covering the lid with transparent material to allow sunlight to pass through while still protecting your plants from the elements. You can use glass, polycarbonate sheets, or even recycled plastic bottles for glazing. Secure the glazing material to the lid using a suitable sealant.

    6. Placement

    Choose a sunny location for your cold frame. Ideally, it should receive at least six hours of direct sunlight daily. Make sure the location is accessible for watering and tending your plants.

    Enjoy Your New Cold Frame

    Congratulations! You have successfully built your own cold frame. Now, you can enjoy a longer growing season, protect your delicate plants, and revel in the satisfaction of creating something useful with your own hands.

    Remember, cold frames are a great way to experiment with new plants and get a jumpstart on your garden each year. So get out there, gather your materials, and start building your very own cold frame!

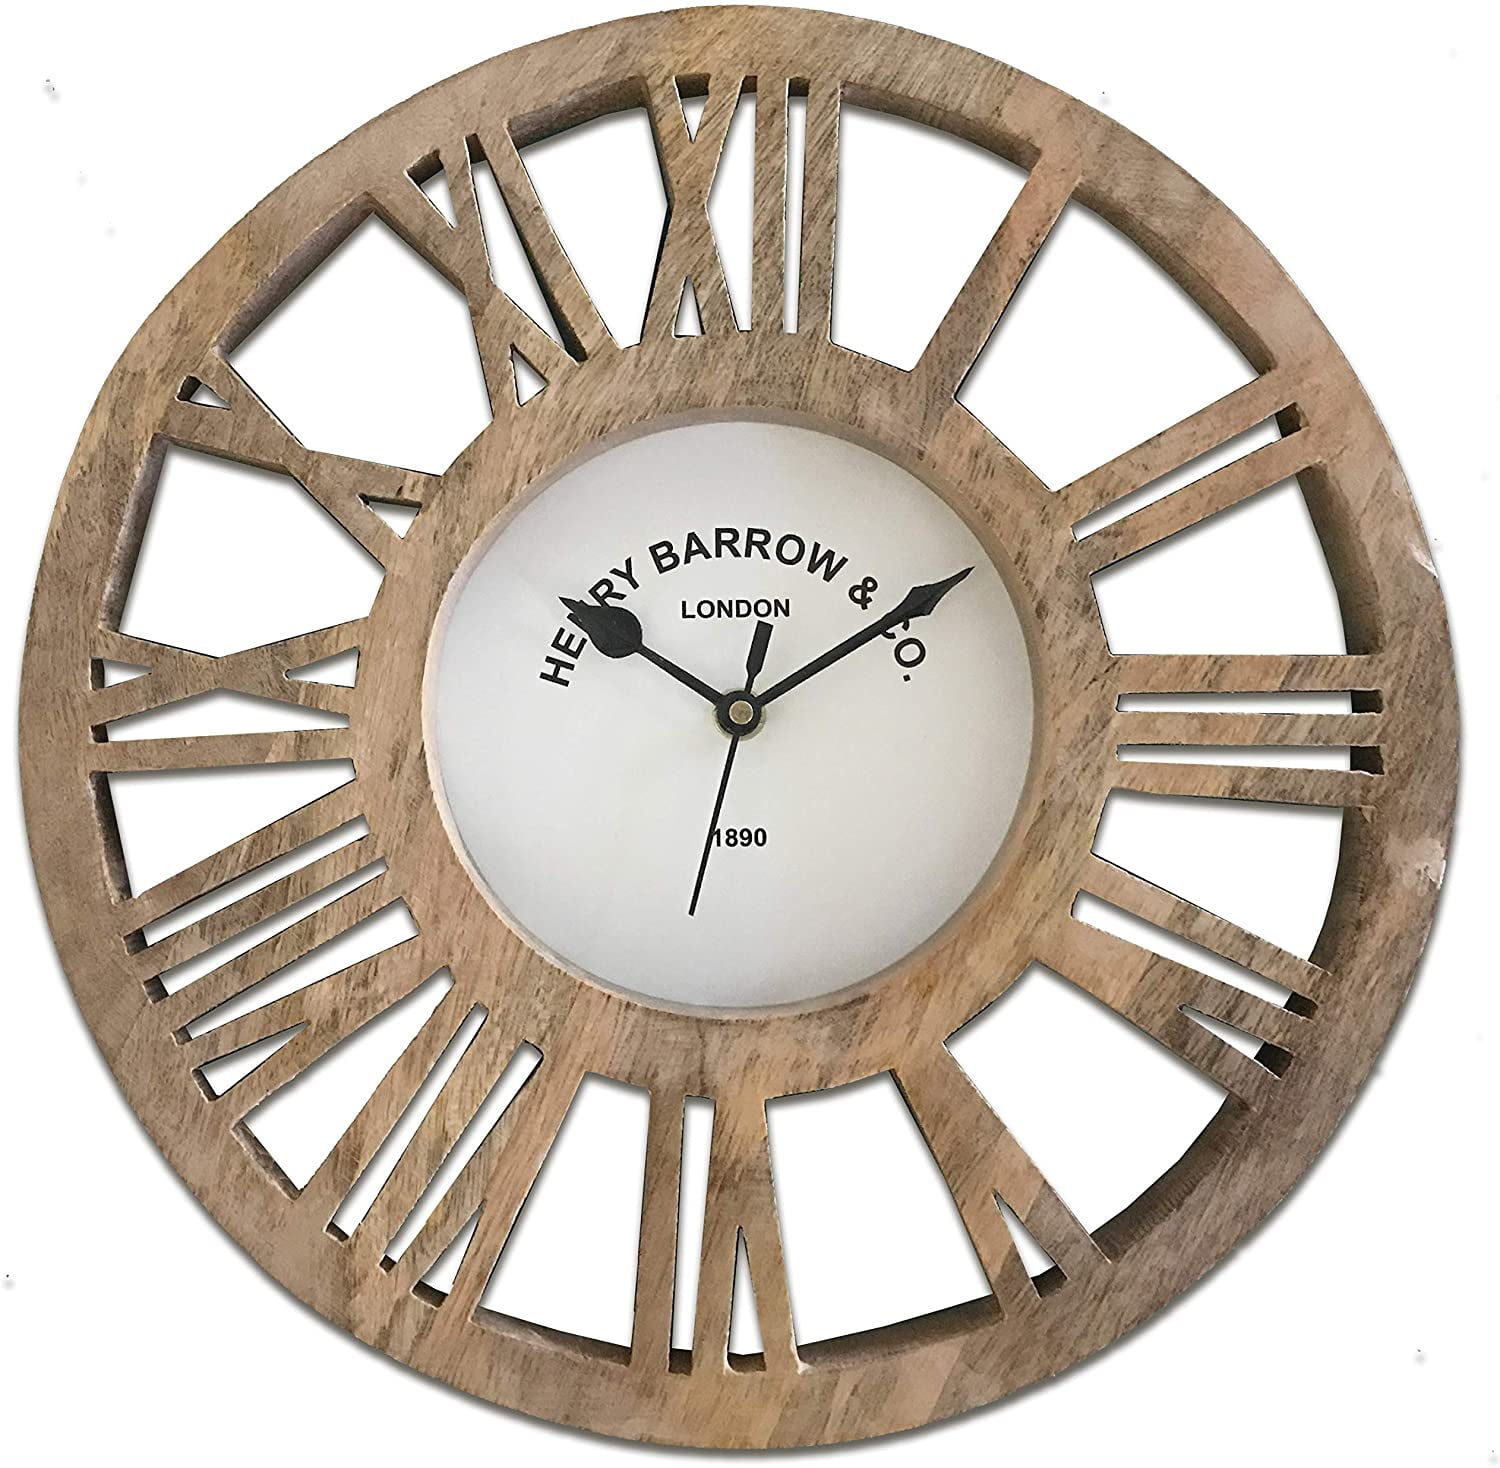
    How to make a wooden clock thatÂ’s perfect for the kitchen

    How to make a wooden clock that’s perfect for the kitchen

    Crafting a Kitchen-Ready Wooden Clock: A DIY Guide

    Hey there, fellow kitchen enthusiasts! Ever wished for a clock that perfectly complements your culinary haven? You know, something that’s not just functional but also a statement piece. Well, let’s ditch the generic store-bought options and dive into the world of handcrafted wooden clocks. Trust me, making your own is a rewarding experience that'll leave you with a unique timekeeper that truly reflects your style.

    We'll walk through this project step-by-step, covering everything from choosing the right materials to assembling the final masterpiece. No need to worry about complex woodworking skills â€" we’ll keep it simple, easy to follow, and fun! Ready to unleash your inner crafter? Let’s get started!

    Gathering Your Supplies: The Foundation of a Perfect Clock

    Before diving into the woodworking, let's make sure we have all the ingredients for this culinary timekeeping masterpiece. We’re talking about the essential tools and materials that will be your faithful companions throughout the process.

    Wooden Base

    The heart of your clock â€" choose wisely! You can go for a classic circular shape, a rustic rectangular piece, or even a fun geometric design. Here's what to keep in mind:

    • Size Matters: Consider the space you have in your kitchen. A smaller clock for a compact area, a larger one for a statement piece!
    • Material Magic: Opt for a wood that's sturdy and resistant to moisture. Think maple, cherry, walnut, or even reclaimed wood for an extra dose of charm.
    • Think Finishes: Will you leave it natural, stain it for a richer hue, or paint it to match your kitchen decor? This step is all about unleashing your creativity!

    Clock Movement

    The crucial component that brings your clock to life. There are two main options here:

    • Quartz Movement: The affordable and reliable choice. It runs on a battery and offers a smooth, silent ticking.
    • Mechanical Movement: For a touch of vintage charm. These movements have a classic, rhythmic tick-tock sound but might require more maintenance.

    Clock Hands

    Let's give our clock some personality! You'll find a wide range of hands in different styles, lengths, and materials:

    • Classic and Simple: Opt for black or white hands for a timeless look.
    • Modern and Bold: Explore metal hands in unique finishes or even colorful accents.
    • Go Big or Go Home: Consider oversized hands for a statement piece that's easy to read from afar.

    Additional Supplies

    Don’t forget these handy extras:

    • Sandpaper: For smoothing out rough edges and achieving a flawless finish.
    • Wood Glue: To securely attach the clock movement and hands to the wooden base.
    • Screws: If your clock movement requires mounting screws.
    • Paint, Stain, or Finish: To enhance the wood's natural beauty or add a touch of personality.
    • Measuring Tape, Pencil, and Ruler: For precise marking and measurements.
    • Drill: For creating pilot holes for screws.
    • Safety Glasses and Gloves: Always prioritize safety while working with tools.

    Assembling Your Timepiece: A Step-by-Step Guide

    Now that you have all the ingredients, it’s time to unleash your inner craftsman! This is where the magic truly begins. Just follow these simple steps, and you'll be amazed by what you can create.

    Step 1: Prepare the Base

    Start by sanding the wooden base thoroughly, ensuring it's smooth to the touch. This step is key for a professional-looking finish. If you're painting or staining, apply it now and let it dry completely.

    Step 2: Marking and Drilling

    Locate the center of your wooden base using a ruler and pencil. Mark the spot where you'll attach the clock movement. If your movement requires screws, drill pilot holes at the marked locations. Be sure to use a drill bit that’s slightly smaller than the screws.

    Step 3: Attach the Clock Movement

    Carefully align the clock movement with your marked spot on the wooden base. Secure it using wood glue and screws (if needed). Let the glue dry completely before proceeding. Remember, patience is key!

    Step 4: Installing the Clock Hands

    Insert the clock hands onto the movement's shaft, following the instructions provided with your movement. Align them with the corresponding holes and gently tighten the nuts. Remember, the longer hand is the minute hand, and the shorter hand is the hour hand.

    Step 5: Add Finishing Touches (Optional)

    This is where you can truly personalize your clock! Maybe you want to add a decorative border around the clock face, a unique inscription, or even a fun kitchen-themed design. Get creative and make it uniquely yours!

    Step 6: Final Assembly and Testing

    Install the battery (if required) into the clock movement. Now, sit back and admire your handcrafted masterpiece! Does the clock run smoothly? If not, double-check that the hands are properly installed and the battery is correctly inserted.

    Adding a Personal Touch: Embellishing Your Clock

    Now that you have a functional clock, it’s time to give it that extra spark that makes it a true expression of your kitchen personality. Let's explore some fun embellishments that will take your wooden clock from ordinary to extraordinary.

    Paint and Stain Options

    • Chalkboard Paint: This adds a fun, interactive element. Write your daily menu, grocery list, or inspirational quotes!
    • Metallic Paint: Give your clock a sophisticated touch with gold, silver, or copper accents.
    • Distressed Finish: Create a vintage look by sanding down the edges or adding a layer of crackle medium.
    • Stencils: Choose a kitchen-themed design, like fruits, vegetables, or cooking utensils, and use stencils to create a unique pattern.

    Creative Embellishments

    • Decoupage: Add a touch of whimsy with patterned paper, fabric, or even vintage postcards.
    • Mosaic Tiles: Create a stunning visual centerpiece with colorful mosaic tiles.
    • Wood Burning: Add intricate details or personalize your clock with a handwritten message using a wood burning tool.
    • Vintage Hardware: Add a touch of nostalgia with antique knobs, hinges, or hooks.

    Displaying Your Culinary Timekeeper: A Place of Pride

    Congratulations! You’ve created a beautiful and functional wooden clock. Now, it’s time to give it a prime spot in your kitchen where it can truly shine.

    Finding the Perfect Place

    Consider these factors when deciding where to display your clock:

    • Visibility: Choose a spot where the clock is easily visible from various areas in your kitchen.
    • Harmony: Ensure it complements the overall style and color scheme of your kitchen.
    • Functionality: Place it in a location where you can easily see the time while preparing meals or engaging in other kitchen activities.

    Display Ideas

    • Shelves: A simple and stylish way to display your clock.
    • Hooks: Hang it on a hook near your stove or refrigerator.
    • Wall Mounts: For a more permanent and eye-catching display.
    • Freestanding: If you have a large kitchen island or countertop, a freestanding clock can make a bold statement.

    Remember, the most important thing is to choose a location that you love! After all, your handcrafted wooden clock deserves a place of honor in your culinary sanctuary.

    So, go forth and unleash your creativity! Craft a wooden clock that reflects your kitchen's unique personality and adds a touch of warmth and charm to your culinary haven. Happy crafting!

    Best Practices for Building a Squirrel Den Box

    Best Practices for Building a Squirrel Den Box

    Building a Squirrel Den Box: A Guide for Nature Lovers

    Watching squirrels scamper through the trees and gather nuts is a delightful part of nature's everyday show. But did you know that you can provide a safe and cozy haven for these furry acrobats by building a squirrel den box? Not only will it be a delightful project, but it's also a rewarding way to contribute to the well-being of these charming creatures. Let's dive into the best practices for building a squirrel den box that will be a welcome addition to your backyard.

    Choosing the Right Materials

    The heart of a squirrel den box is its construction. You want a material that's sturdy, weather-resistant, and safe for your furry tenant. Here's what to consider:

    Wood Choices

  • Cedar: A classic choice due to its durability, natural insect-repellent qualities, and pleasant aroma. It's also a relatively lightweight wood, making it easier to work with.
  • Redwood: Another top contender for its longevity, water resistance, and beautiful reddish-brown color. It's also resistant to rot and decay.
  • Pine: An affordable and readily available option. While not as durable as cedar or redwood, pine can still work well if treated properly with a water-resistant sealant.
  • Pressure-Treated Wood: Avoid using pressure-treated wood. It's often treated with chemicals that could be harmful to squirrels.
  • Other Materials

    You'll also need a few other materials to complete your squirrel den box:

  • Screws: Use exterior-grade screws that are rust-resistant.
  • Wood glue: Helps create strong, lasting bonds between wood pieces.
  • Water-resistant sealant: Protect the wood from moisture and elements, especially if using pine.
  • Metal flashing: For the roof, helps direct water away from the box.
  • Designing the Perfect Den Box

    The dimensions and design of your squirrel den box play a crucial role in attracting and accommodating squirrels. Here's a general outline to follow:

    Size Matters

    Aim for a den box that's spacious enough for a squirrel to move comfortably, but not too large that it becomes difficult to heat. A good starting point is:

    • Width: 8-10 inches
    • Height: 10-12 inches
    • Depth: 12-14 inches

    The Entry Hole

    The size of the entry hole is crucial. You want to make sure it's large enough for a squirrel to enter easily, but small enough to deter larger predators. A good rule of thumb is:

    • Diameter: 3-4 inches

    Position the entry hole on the side of the box, approximately 6-8 inches from the bottom. This helps protect the squirrel from predators while allowing for drainage.

    Ventilation

    Squirrels need ventilation to prevent mold and mildew buildup. You can add a few small holes at the top or bottom of the box to allow for air circulation. Be sure to cover these holes with wire mesh to prevent squirrels from escaping and predators from entering.

    Roof

    A durable roof is essential to shield the squirrel from the elements. Consider using a single piece of wood or plywood that overhangs the sides of the box by at least an inch to provide extra protection.

    Landing Platform

    Adding a small landing platform below the entry hole is a thoughtful touch. It gives squirrels a place to rest their feet before entering the box. You can use a small piece of wood or a sturdy branch for this purpose.

    Building Your Squirrel Den Box

    Now, it's time to bring your design to life! Follow these step-by-step instructions:

    Step 1: Cutting the Wood

    Using a saw, cut your chosen wood into the following pieces:

    • Two side panels: 10 inches high by 12 inches wide
    • One back panel: 10 inches high by 12 inches wide
    • One front panel: 10 inches high by 8 inches wide (leaving a 4-inch gap for the entry hole)
    • One roof panel: 12 inches wide by 14 inches long (or larger to create an overhang)
    • One bottom panel: 12 inches wide by 12 inches long
    • One landing platform (optional): 6 inches wide by 6 inches long

    Step 2: Assembling the Box

    Now, it's time to piece together your den box:

    1. Attach the bottom panel: Place the bottom panel on a flat surface and attach the two side panels and back panel to it using screws and wood glue.
    2. Cut the entry hole: In the front panel, cut out a 3-4 inch diameter hole for the entry.
    3. Attach the front panel: Align the front panel with the bottom panel, ensuring the entry hole is positioned correctly. Secure it using screws and wood glue.
    4. Secure the landing platform: If you are using a landing platform, attach it to the bottom of the entry hole, positioned just below the opening.
    5. Attach the roof: Position the roof panel on top of the box, making sure it overhangs the sides by at least an inch. Secure the roof using screws and wood glue.

    Step 3: Adding Finishing Touches

    Once the box is assembled, you can add a few finishing touches to make it extra special:

    • Seal the wood: Apply a water-resistant sealant to all surfaces of the box to protect it from moisture and the elements.
    • Install metal flashing: Place a piece of metal flashing along the edges of the roof, helping to direct water away from the box.
    • Paint or stain (optional): You can paint or stain the box with a natural-colored paint or stain to blend it with the surroundings.

    Setting Up the Squirrel Den Box

    Now that your squirrel den box is complete, let's make it a welcoming home for your furry friend:

    Location, Location, Location

    Choose a location that offers:

    • Protection from the elements: Mount the box on a tree trunk, a sturdy post, or against a building wall for shelter from rain, wind, and sun.
    • Privacy: Position it in a spot that provides cover from predators, such as a dense bush or thick foliage.
    • Access to food and water: Locate it near a good food source, like a bird feeder or a nut-bearing tree, and ensure it is near a water source.

    Making it Inviting

    You can make your squirrel den box even more attractive by:

    • Adding bedding material: Place a small amount of soft bedding material like shredded paper, cloth scraps, or dried leaves inside the box.
    • Offering a small snack: Place a few nuts, seeds, or berries inside the box to entice squirrels to investigate.
    • Be patient: It may take some time for squirrels to discover and accept your den box, so be patient and persistent.

    Enjoying Your Squirrel Den Box

    Once squirrels start using your den box, you'll have a front-row seat to their daily routines. You can observe their playful antics, watch them gather nuts, and even catch glimpses of their adorable babies. Building a squirrel den box is a rewarding experience that brings joy and adds a touch of wild charm to your backyard.

    How to make a wooden clock with simple tools

    How to make a wooden clock with simple tools

    Building a Wooden Clock with Simple Tools: A Step-by-Step Guide

    Want to add a touch of rustic charm and personalized craftsmanship to your home? Building a wooden clock is a rewarding project that can be tackled with basic tools and a little patience. This guide will walk you through the process, from selecting materials to assembling the final piece.

    Gathering Your Supplies

    Before you begin, gather the necessary materials and tools. Here's a list:

    • A circular piece of wood (for the clock face) - You can use plywood, MDF, or even a repurposed piece of wood like a cutting board.
    • Wooden dowels (for the clock hands) - Choose dowels with contrasting colors for a visually appealing effect.
    • Clock mechanism kit - These kits usually include the movement, hands, and mounting hardware. You can find them online or at craft stores.
    • Wood glue
    • Sandpaper (various grits)
    • Wood stain or paint (optional)
    • Protective sealant (optional)
    • Hand saw or jigsaw (for cutting the wood)
    • Drill and drill bits
    • Screwdriver
    • Measuring tape
    • Pencil
    • Clamps (optional)

    Preparing the Clock Face

    Start by preparing your clock face. If using a circular piece of wood, ensure it's smooth and free of imperfections. If you're using a piece of wood that needs to be cut, use a hand saw or jigsaw to carefully cut the wood into a circle.

    Once your clock face is cut, sand it down using sandpaper of increasing grits to achieve a smooth finish. This will create a base for your stain or paint, if you choose to apply any.

    Adding the Clock Mechanism

    Center the clock mechanism on the back of the clock face. Use a pencil to mark the location of the mounting holes. Drill pilot holes using a drill bit slightly smaller than the screws provided in the kit. Now, secure the clock mechanism to the clock face using the screws.

    Creating the Clock Hands

    Cut your wooden dowels to create the hour and minute hands. The hour hand should be slightly shorter than the minute hand. Use a pencil to mark the desired lengths on the dowels and cut them using a saw or jigsaw. Smooth the edges of the cut dowels with sandpaper.

    Next, use sandpaper to slightly taper the ends of the hands for a more elegant appearance. If you want a more decorative look, you can shape the ends of the hands into points or other designs.

    Assembling the Clock

    Once you've prepared the hands, carefully insert them onto the clock mechanism. The hour hand will go on the shorter shaft, while the minute hand goes on the longer shaft. Ensure the hands are seated properly and secured.

    Test the clock mechanism by turning the setting knob. The hands should move smoothly and accurately.

    Adding the Finishing Touches

    If you wish, stain or paint the clock face to your liking. Allow the stain or paint to dry completely before applying a protective sealant, if desired. This will help protect the wood and prevent any potential damage from moisture or spills.

    Finally, you can add decorative elements to your clock face, such as Roman numerals, a decorative border, or even a personalized inscription. Be creative and let your personal style shine through.

    Mounting Your Clock

    Select a suitable location for your clock and use the appropriate mounting hardware provided in the kit. The clock mechanism usually comes with a bracket that can be mounted directly to a wall or a surface.

    Congratulations! You've just built a unique and personalized wooden clock that will add charm and character to your home.

    Building a large wooden clock: step-by-step guide

    Building a large wooden clock: step-by-step guide

    Building a Large Wooden Clock: A Comprehensive Guide

    Crafting a large wooden clock is a rewarding project that blends woodworking skills with artistic expression. This guide provides a step-by-step process to help you create a stunning and functional timepiece that will be the focal point of your home or office. From selecting materials to final finishing touches, each stage is detailed to ensure success.

    1. Planning and Design

    Before embarking on construction, careful planning is essential.

    1.1 Size and Shape

    Determine the desired size and shape of your clock. Consider the available space and the overall aesthetic you want to achieve. A large clock can be a statement piece, while a smaller one might blend seamlessly with existing décor. Explore various shapes, such as square, round, or even whimsical designs.

    1.2 Clock Mechanism

    Choose a suitable clock mechanism. Quartz mechanisms are affordable and reliable, while mechanical movements offer a more traditional feel. Determine the desired size of the clock hands and their style to complement the overall design.

    1.3 Materials

    Select the appropriate wood for your clock. Hardwood species like oak, walnut, or cherry offer durability and rich color variations. Consider the weight of the wood, especially for larger clocks. Use plywood or MDF for the clock face and other structural components.

    1.4 Design Sketch

    Create a detailed sketch or digital design of your clock. Include dimensions, material types, and the arrangement of clock hands, numbers, and decorative elements. This visual representation will serve as a blueprint throughout the construction process.

    2. Cutting and Assembly

    With the design finalized, it's time to start cutting and assembling the clock components.

    2.1 Cutting the Wood

    Using precise measurements from your design, cut the wood for the clock face, frame, and other elements. Utilize a table saw, circular saw, or jigsaw for accurate cuts. Ensure the wood is clean and free of splinters.

    2.2 Assembling the Frame

    If your clock design includes a frame, assemble it using mortise and tenon joints, dovetail joints, or simple butt joints. Use wood glue and clamps to secure the joints, and allow them to dry thoroughly.

    2.3 Clock Face

    Prepare the clock face. If using plywood or MDF, ensure it's smooth and level. If you're using a solid wood board, consider sanding it to achieve a smooth finish.

    3. Marking and Installing the Clock Mechanism

    Precisely marking and installing the clock mechanism is crucial for accurate timekeeping.

    3.1 Marking the Center

    Using a compass or ruler, carefully mark the center of the clock face where the mechanism will be mounted. Ensure the marking is accurate, as any deviation will affect the clock's alignment.

    3.2 Installing the Mechanism

    Follow the manufacturer's instructions for mounting the clock mechanism. Typically, this involves securing the mechanism to the clock face using screws or bolts. Use a drill bit slightly smaller than the screw size to avoid splitting the wood. Ensure the mechanism is securely mounted and level.

    4. Adding Numbers and Decorative Elements

    Adding numbers and decorative elements transforms the clock into a unique and personalized timepiece.

    4.1 Clock Numbers

    Choose a font and style for your clock numbers. Roman numerals, Arabic numerals, or even decorative fonts can be used. Consider the size and placement of the numbers to maintain a balanced aesthetic.

    There are several ways to add numbers:

  • Stencils: Use stencils to paint the numbers directly onto the clock face. This is a simple and versatile method.
  • Hand-Carved Numbers: For a more elaborate design, carve the numbers out of wood and attach them to the clock face. This requires a higher level of woodworking skill.
  • Laser-Cut Numbers: Consider using a laser cutter to create precise numbers from a variety of materials.
  • 4.2 Decorative Elements

    Enhance the clock's design with decorative elements. You can add decorative trim, inlays, carvings, or even paint designs. Be creative and choose elements that complement the overall aesthetic of your clock.

    5. Sanding and Finishing

    Once the clock is assembled and decorated, it's time to smooth out any imperfections and apply a protective finish.

    5.1 Sanding

    Sand the entire clock using progressively finer grits of sandpaper. This will create a smooth surface for the finish. Start with a coarse grit to remove any rough edges and then gradually move to finer grits to eliminate scratches and imperfections.

    5.2 Staining (Optional)

    If desired, apply a wood stain to enhance the natural color of the wood. Choose a stain color that complements the clock's design. Apply the stain evenly and let it dry completely before proceeding to the next step.

    5.3 Finishing

    Apply a clear finish to protect the wood and enhance its appearance. Options include polyurethane, varnish, or wax. Choose a finish that is appropriate for the wood type and the desired level of gloss. Apply the finish in thin coats, allowing each coat to dry completely before applying the next.

    6. Hanging the Clock

    Once the clock is completely finished, it's ready to be hung.

    6.1 Clock Hands

    Attach the clock hands to the mechanism according to the manufacturer's instructions. Use the appropriate tools to secure the hands without damaging the mechanism.

    6.2 Mounting the Clock

    Choose a suitable location to hang the clock. Ensure that the location is level and stable. Use heavy-duty picture-hanging hardware to secure the clock to the wall.

    6.3 Setting the Time

    Once the clock is hung, set the time by adjusting the hands or using the clock mechanism's controls.

    Conclusion

    Building a large wooden clock is a challenging but rewarding project. With careful planning, precise execution, and a touch of artistry, you can create a unique and functional timepiece that will be a source of pride for years to come. Remember to enjoy the process, embrace imperfections, and let your creativity shine through.

    ◄ Newer Post Older Post ►
     

    Copyright 2011 Rustic Wooden Bench