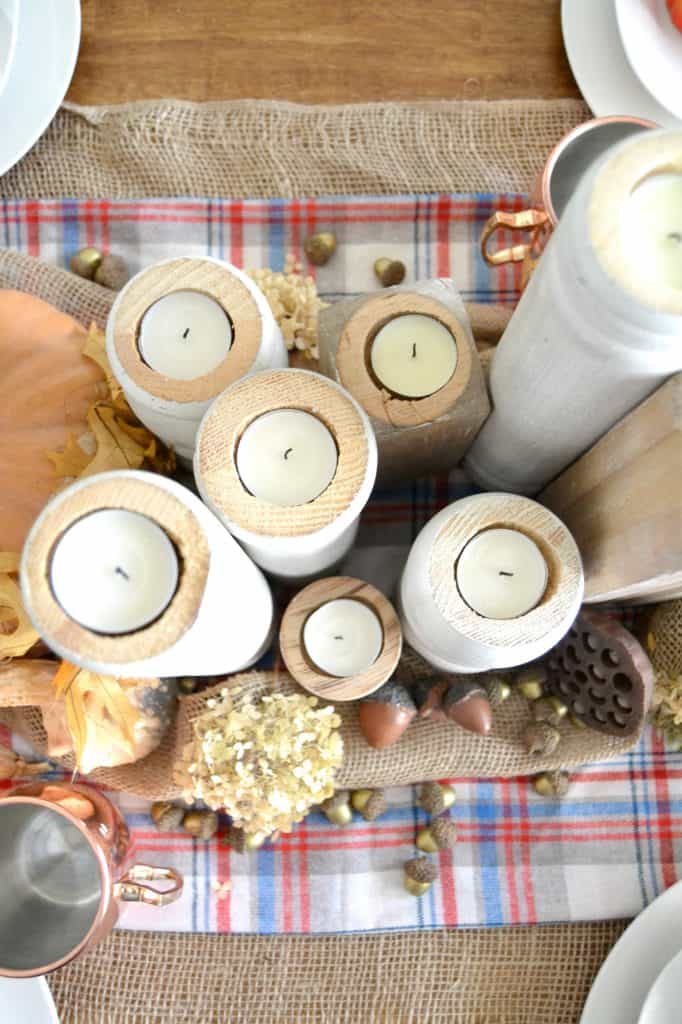
Crafting Captivating Wooden Candle Holders: The Perfect Gift
Looking for a unique and heartfelt gift that showcases your creativity and thoughtfulness? Look no further than handcrafted wooden candle holders! These charming pieces, imbued with warmth and natural beauty, are sure to delight any recipient. Whether you're a seasoned woodworker or a novice crafter, this guide will equip you with the knowledge and inspiration to create stunning candle holders that will illuminate the lives of your loved ones.
Selecting the Perfect Wood and Design
The journey of crafting a beautiful wooden candle holder begins with the selection of your wood. Consider the character and ambiance you want to convey. For a rustic feel, embrace reclaimed wood with its intriguing knots and grain patterns. If you prefer a more polished aesthetic, opt for hardwoods like walnut or cherry, known for their rich colors and smooth textures.
Let Your Creativity Flow:
There are endless design possibilities when it comes to wooden candle holders. Here are a few ideas to ignite your imagination:
- Simple and Elegant: Create a minimalist design with a circular or square base and a slender pillar to support a single candle.
- Rustic Charm: Embrace the beauty of natural wood by incorporating branches, twigs, or driftwood into your design. These elements add a touch of organic whimsy.
- Geometric Wonders: Explore geometric shapes like triangles, hexagons, or pyramids to create a modern and visually striking candle holder.
- Tiered Delight: Design a candle holder with multiple tiers to accommodate various sizes of candles and create a cascading effect.
Gathering Your Tools and Materials
Before you dive into the crafting process, gather the necessary tools and materials. This will ensure a smooth and enjoyable experience. Here's a list of essential items:
- Wood: Choose your preferred wood type, ensuring it's properly dried and free of defects.
- Saw: A handsaw or jigsaw is ideal for cutting your wood to the desired size and shape.
- Sandpaper: Use various grits of sandpaper to smooth out the wood surface and remove any imperfections.
- Drill: Use a drill with appropriate drill bits to create holes for candles and for any additional decorative elements.
- Screwdriver or Hammer: You'll need these tools for assembling the candle holder if you opt for a multi-piece design.
- Wood Glue: Use wood glue to securely join the different pieces of your candle holder.
- Finish: Apply a finish like varnish, oil, or wax to protect your wood and enhance its natural beauty.
- Candles: Choose candles that complement the style and size of your candle holder.
Building Your Masterpiece: Step-by-Step Instructions
Now it's time to bring your design to life! Here's a general guide you can adapt to your chosen design:
- Sketch your design: Draw a detailed sketch of your candle holder on paper. This will help you visualize the final product and ensure all your measurements are accurate.
- Cut your wood: Using your saw, carefully cut the wood pieces according to your sketch. Remember to account for any joints or overlaps in your design.
- Sand the wood: Sand the wood pieces using progressively finer grit sandpaper to achieve a smooth finish. Be sure to sand all surfaces, including edges, for a professional look.
- Drill holes: Use a drill to create holes for your candles. Ensure the holes are large enough to accommodate the candle diameter and deep enough to prevent the candle from tipping. If you're adding any decorative elements, drill holes to accommodate them.
- Assemble the pieces: If your design involves multiple pieces, use wood glue to join them together. Secure them with clamps and allow the glue to dry thoroughly.
- Apply the finish: Choose a finish that aligns with your desired look. Varnish offers a glossy protective layer, while oil and wax create a more natural finish. Apply the finish according to the manufacturer's instructions.
- Let it dry: Allow the finish to dry completely before placing candles in the holder.
Enhance Your Candle Holder with Personalization
To truly make your candle holder a treasured gift, consider adding a personal touch. Here are a few ideas:
- Engraving: Use a wood-burning tool or laser engraver to create a unique design or personalize the holder with a name or special message.
- Inlay: Add a touch of elegance by incorporating a small piece of contrasting wood or metal into the design. This creates a unique and visually appealing feature.
- Painting: Paint the candle holder with a coat of stain or use a decorative paint technique for a personalized touch.
Presentation Makes the Gift
Once your candle holder is complete, present it beautifully to make it an unforgettable gift. Consider these ideas:
- Gift Box: Place the candle holder in a decorative box, adorned with ribbon or tissue paper, for an elegant presentation.
- Personalized Tag: Add a handwritten tag with a heartfelt message or a special quote to add a touch of sentimentality.
- Scented Candle: Include a scented candle that complements the candle holder's design or the recipient's preferences.
Illuminating Lives with Thoughtful Craftsmanship
Crafting a wooden candle holder is a labor of love that allows you to express your creativity and share a piece of your heart with a loved one. From the selection of wood to the final touches of personalization, every step of the process allows you to create a unique and cherished gift that will illuminate their lives with warmth and beauty. So, gather your tools, embrace your creativity, and embark on this fulfilling journey of crafting a truly memorable wooden candle holder.
