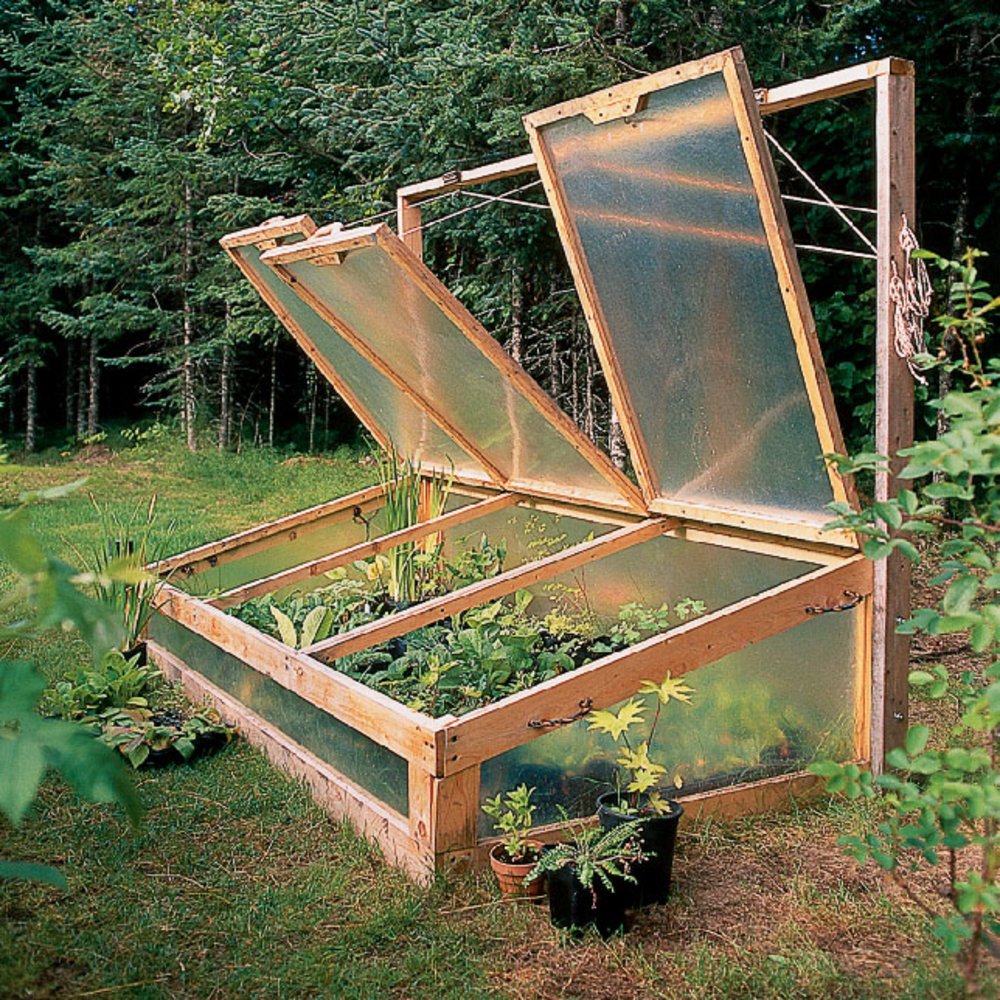
Winter Cold Frame Plans for Any Budget
Extend your gardening season and enjoy fresh vegetables even during the winter months with a cold frame. These simple structures act as mini-greenhouses, providing a protected environment for plants to thrive in colder temperatures. Building a cold frame is a rewarding DIY project that can be tailored to your needs and budget. Whether you're a seasoned gardener or just starting out, this guide provides comprehensive plans and tips to help you create the perfect cold frame for your garden.
Understanding Cold Frames
Cold frames are essentially miniature greenhouses without heating. They harness the sun's energy to create a warmer microclimate inside, protecting plants from frost and harsh weather conditions. The basic structure consists of a frame made of wood, metal, or even recycled materials, topped with a transparent cover, often glass or polycarbonate panels.
Benefits of Using a Cold Frame
Types of Cold Frames
Cold frames come in various designs and sizes to suit different needs and preferences. Here are some common types:
1. Traditional Cold Frame
The classic cold frame features a rectangular wooden frame with a sloping glass or polycarbonate cover. This design is simple to build and offers excellent insulation. However, it can be heavy and difficult to move.
2. Gable-Top Cold Frame
Similar to the traditional design, the gable-top cold frame has a roof shaped like a gable, providing increased headroom and ventilation. This design is ideal for taller plants and can be easily adapted for various sizes.
3. Lean-To Cold Frame
A lean-to cold frame is attached to an existing wall or structure, creating a sheltered space that takes advantage of the wall's insulation. This design is compact and requires less materials, but it may have limited sun exposure.
4. Portable Cold Frame
Portable cold frames are designed for easy movement, allowing you to relocate them as needed to maximize sun exposure or protect plants from harsh conditions. They are typically made of lightweight materials like PVC pipe or metal frames.
Cold Frame Construction: A Step-by-Step Guide
Building a cold frame is a straightforward process that requires basic woodworking skills and a few essential tools. This guide outlines the steps for constructing a traditional cold frame:
1. Gather Materials
2. Cut the Wood
Cut the lumber according to your desired dimensions. For a standard cold frame, a 4x4 foot base is recommended. Cut two pieces for the front and back of the frame, two for the sides, and two for the bracing. Cut the top of the frame to fit the size of your glass or polycarbonate panels.
3. Assemble the Frame
Using screws and corner braces, assemble the frame, ensuring that the corners are square and the sides are parallel. Attach the bracing to the inside of the frame to reinforce its structure. Leave a small gap between the front and back of the frame for ventilation.
4. Attach the Cover
Choose the method for attaching the cover based on the material you used. Glass panels can be secured with glazing strips or a silicone sealant. Polycarbonate panels can be attached with screws, clips, or a combination of both.
5. Position and Level the Cold Frame
Choose a sunny location for your cold frame and place it on level ground. You may need to adjust the legs or use leveling blocks to ensure proper drainage. Consider adding a layer of gravel or stones beneath the frame for better drainage.
6. Ventilate and Shade
Proper ventilation is crucial for healthy plant growth. Open the lid of the cold frame on warmer days to allow air circulation and prevent overheating. During extremely hot periods, consider shading the cold frame to reduce heat buildup.
Tips for Success
Budget-Friendly Options
Building a cold frame doesn't have to break the bank. Here are some cost-effective options:
1. Recycled Materials
Repurpose old windows, doors, or even discarded pallets to create a unique and sustainable cold frame. Get creative and experiment with different materials to find what works best for you.
2. DIY Frames
Instead of purchasing pre-cut lumber, consider using scrap wood or inexpensive plywood to construct the frame. You can save money by cutting and assembling the frame yourself.
3. Simple Designs
Opt for a simpler cold frame design with fewer materials and fewer steps. A lean-to or a single-pane design can be built quickly and easily.
Conclusion
Building a cold frame is an excellent way to extend your gardening season and enjoy fresh, homegrown produce year-round. With a little planning and creativity, you can create a functional and budget-friendly cold frame that suits your specific needs and enhances your gardening experience.
